Pages

Thursday, February 16, 2012

A Special Chocolate Cake

On February 13, 2012, it was the 10th anniversary of my mom's passing. It was a hard day. Harder then any other anniversary so far. It was just so hard to believe that a full decade had passed. Where did the time go? And why does it still feel like it was only yesterday that we lost her?
(For those of you that don't know, my mom was a Type-1 diabetic. She lost her life-long battle with the terrible disease at the young age of 50).

My sister and I decided to get together, along with our families, to have a big dinner to celebrate our mom's life. I made mom's favorite spaghetti with meat sauce, along with salad and garlic bread. Then for dessert I made her a special chocolate cake. How was the cake special you ask? Well, my mom loved to bake. She would make the best treats for us, but could never eat any of them, because of her diabetes. Throughout our childhood, mom would often joke to my sister and I that her one wish in life was be to bake herself the biggest, richest chocolate cake, and then eat the entire thing herself.

So, I decided to finally make her that rich, decedent, over-the-top, chocolate cake she always wanted. I believe this cake would have made her so very happy, even if she could have only had just one bite.  Please enjoy this recipe, in honor of my mom :)


Favorite Fudge Birthday Cake
(recipe adapted from King Arthur Flour)

For the cake:

2 cups granulated sugar
2 cups all-purpose flour
2 T cornstarch (I used more all-purpose flour)
3/4 cup dutch-process cocoa
2 tsp baking powder
2 tsp espresso powder (optional, as a flavor enhancer, but I highly recommend using it)
1/2 tsp baking soda
1 tsp salt
4 large eggs
3/4 cup vegetable oil
2 tsp vanilla extract
1 1/4 cups water

For the filling:

12 ounces semi-sweet chocolate, chopped (about 1 1/2 cups)
6 ounces heavy cream

For the icing:

8 ounces semi-sweet chocolate, chopped (about 1 cup)
4 ounces heavy cream


Directions:

Preheat oven to 350 degrees. Spray two 8 X 2 inch round cake pans with non-stick baking spray. If you do not have 8 inch cake pans that have 2 inch high walls, use 9 inch round pans instead.

In the bowl of an electric mixer, combine the sugar, flour, cornstarch, cocoa, baking powder, espresso powder, baking soda and salt. Mix well.

Add the eggs, oil, vanilla and water. Mix well until smooth.

Pour the batter evenly into each of the prepared pans. Bake the cakes for 35-38 minutes, or until a toothpick or cake tester, inserted in the middle, comes out clean.

Cool the cakes for at least 15 minutes in the pans before removing to wire racks to cool completely.

Once cool, use a long serrated knife to cut both of the cakes in half horizontally, resulting in 4 cake layers.

Next, make the filling. Heat the 6 ounces of heavy cream and 12 ounces of chocolate in a saucepan or in a microwavable dish, until hot and the chocolate is very soft. Stir until the mixture turns into a smooth, thick ganache.

Place one cake layer on a serving plate (if desired, cut strips of parchment paper and place under the edges of the cake to catch any drips).
Spread 1/3 of the ganache filling over the bottom layer of cake, but don't spread it all the way to the edge.
Add the second layer of cake and top with another 1/3 of the filling. Repeat with the third layer of cake and remaining filling.
Top with the remaining cake layer.

Then, make the icing. Heat the 4 ounces of heavy cream and the 8 ounces of chocolate in a small saucepan or in the microwave until hot and the chocolate is very soft. Stir until the mixture turns into a smooth, thick ganache, just like the filling.

Pour and spread the icing over the top of the cake, letting it drip down the sides. Once it's done dripping, smooth the sides with a spatula, if desired. (At this point, I topped my cake with shaved dark chocolate for decoration).

Pull out the parchment strips from under the bottom layer of cake. Allow the cake to rest, covered with a cake cover or large bowl, until the chocolate is set. Overnight is the best, but several hours would be ok.

Cut the cake, serve and enjoy!


Friday, February 10, 2012

Dark Chocolate Hazelnut Truffles

It's almost Valentine's Day! I like to bake my husband special things throughout the year, but for Valentine's Day, I devote all  of my energy to making him something totally chocolate. I can't think of a better way to achieve that then with truffles!
My husband loves Lindt hazelnut truffles so I decided to make him a homemade version of them. I think they came out awesome. The only change I would make next time is to either up the amount of the hazelnut liqueur, or try using a bolder hazelnut flavoring, like this one that I found at KAF. I just think the hazelnut flavor in the filling of these truffles is a little weak, but they are still super yummy! I know my husband is going to love them!


Dark Chocolate Hazelnut Truffles
(recipe adapted from Smitten Kitchen who adapted it from Ina Garten)

1 cup hazelnuts, chopped
3 1/2 ounces good bittersweet chocolate (about 1/2 cup)
3 1/2 ounces good semisweet chocolate (about 1/2 cup)
1/2 cup heavy cream
1 1/2 T hazelnut liqueur (I used Frangelico)
1 T prepared coffee (warm is ok)
1/2 tsp good vanilla extract


Preheat the oven to 325 degrees.

Place chopped hazelnuts on a baking sheet (I lined mine with foil). Roast for about 10-15 minutes until fragrant. Set aside to cool.

Coarsely chop the bittersweet and semisweet chocolate and place in a medium sized bowl (try to use a bowl that can either be microwaved or used as a double-boiler).

Heat the cream in a sauce pan or in the microwave until boiling. Immediately pour the hot cream over the chopped chocolate. Using a wire whisk, stir the chocolate and cream until the chocolate is completely melted and smooth (if the chocolate doesn't completely melt, place the bowl over simmering water-like a double-boiler, or microwave at 50% power for 30 second intervals, until it's completely melted).

Whisk in the hazelnut liqueur, coffee and vanilla. Cover the chocolate and refrigerate until firm enough to scoop, about an hour or so.

Scoop out small dollops of chocolate and roll into balls using your hands. Work quickly because the chocolate will melt. Place chocolate balls onto a wax or parchment lined baking sheet. Refrigerate again for 15 minutes or so until the chocolate has firmed up again.

Roll the chocolate balls in the toasted hazelnuts, lightly pressing them into the chocolate so they stick. At this point the truffles are finished and can be stored in the refrigerator, but I decided to dip them in melted chocolate as well. I melted some dark chocolate candy melts, dipped the truffles in it and then sprinkled a few chopped hazelnuts on top. I think they came out very pretty. You could also just drizzle a little melted chocolate over the top as more of a garnish. Whatever way you decide to make them, they are sure to be fabulous!  Enjoy!


Tuesday, February 7, 2012

Spinach, Mushroom and Artichoke Stromboli

Stromboli's are very easy to make, and the flavor possibilities are endless. My family likes traditional pizza flavors in their Stromboli's, but I prefer more grown-up flavors and spice in mine. This particular recipe is one of my favorites, and it's rare that I get to make it because my kids (and husband) are not a huge fan of any of the ingredients. I hope you enjoy it!


Spinach, Mushroom and Artichoke Stromboli
(pizza dough recipe from Annie's Eats. Filling is my creation)

Basic pizza dough (can use store bought pizza dough and skip this step):

2 1/4 tsp instant yeast
1/2 cup warm water
4 cups all-purpose or bread flour
1 1/2 tsp salt
1 1/4 cups water, at room temperature

For the toppings:

2 cups shredded mozzarella cheese (I used reduced fat 2% milk)
About 2 cups coarsely chopped baby spinach (I just rip it)
1 cup sliced mushrooms
1/2 cup canned or jarred artichokes (in water), drained, coarsely chopped
1/4 cup finely diced red onion, optional
1 tsp Pizza Seasoning, optional (I buy it from KAF. It adds a lot of flavor)
Pinch to a 1/4 tsp of red pepper flakes, optional
Kosher salt, to taste (I use about 1/2 tsp or so)
Pizza sauce, for serving
1 egg, for egg wash

To make the pizza dough:

Sprinkle the yeast over the 1/2 cup of warm water using a 2-cup measuring cup.
In the bowl of an electric mixer, combine the flour and salt, mix lightly using the paddle attachment.
Add the room temperature water to the warm water-yeast mixture in the same measuring cup.
With the mixer on low, add the water/yeast to the flour along with the olive oil. Mix until a cohesive dough is formed.
Switch the paddle attachment with the dough hook. Knead the dough on low until it is smooth and elastic.
Transfer the dough to a large lightly oiled bowl, turning once to coat the dough with oil. Cover with plastic wrap and let rise until doubled in size, about 1 1/2 to 2 hours.
When the dough has doubled, punch it down to deflate it, and then transfer to a lightly floured work surface. Divide the dough into 2 equal pieces. Form each piece into smooth round balls. Cover the dough with a clean, damp cloth, and let it relax for 10-20 minutes (not more than 30 minutes).

Preheat oven to 400 degrees.

On the same floured surface, roll out each dough ball into a large rectangle, about 10 x 14 inches.
Sprinkle the dough with 1 cup of the cheese, leaving 1/2 inch from the edges. Then sprinkle 1/2 tsp of the pizza seasoning (if using) on top of the cheese. Then layer the spinach on top of the cheese, and sprinkle with the salt, and with the red pepper flakes. Then add the mushrooms, onions (if using) and the artichokes. Sprinkle the remaining cheese evenly over the top, along with the remaining pizza seasoning.


Start rolling the dough, like a jelly roll, starting from the long side farthest away from you, keeping the roll fairly tight. Pinch the ends to seal as you go. I recommend brushing the edge with water to help seal it. (Sorry, I couldn't get a picture for this step--it's hard to roll and take pictures at the same time!)

Place the Stromboli, seam side down, on a baking sheet lined with parchment paper or a baking mat. Cut 3-4 small slits along the top. Lightly brush the top with olive oil and then sprinkle with a little more pizza seasoning (optional). Then brush the Stromboli with the egg wash.


Place on the middle rack in the oven and bake for 25-30 minutes, until golden brown. Let sit for about 10 minutes. Using a serrated knife, slice into 2 inch thick pieces. Serve with warm pizza sauce for dipping. Enjoy!


Friday, January 13, 2012

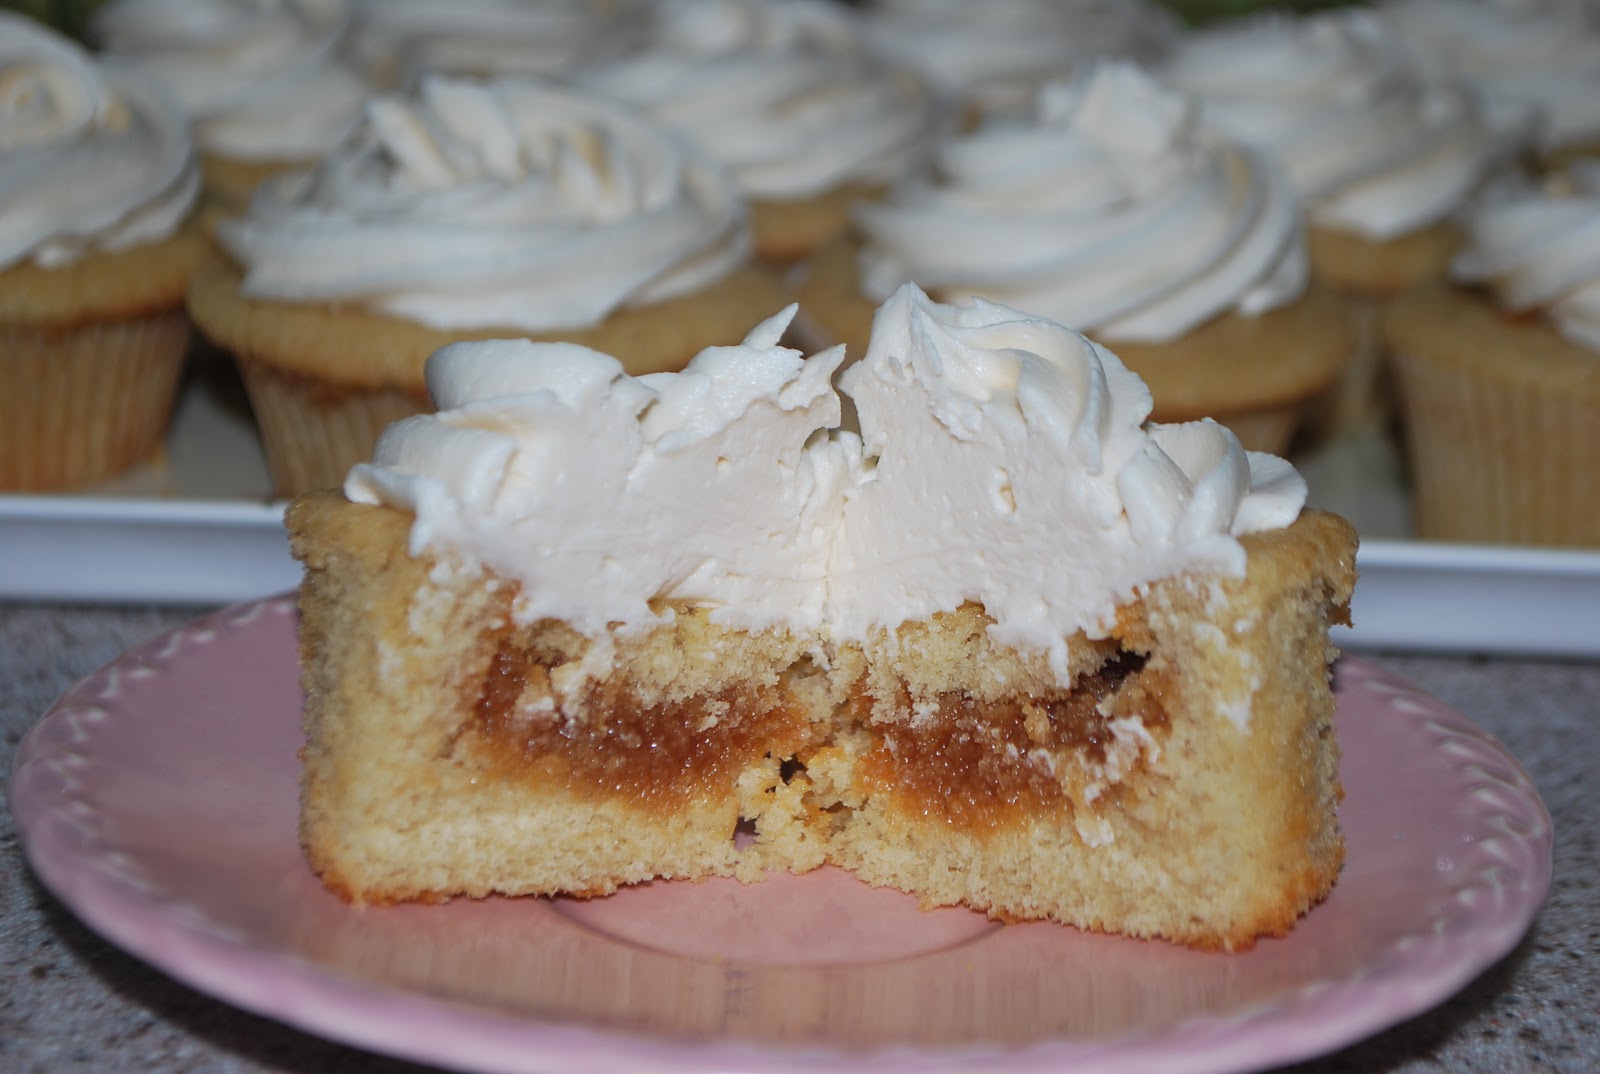
Salted Caramel Cupcakes--Happy Blogiversary To Me!

Wow, today my blog turns one! I can't believe an entire year has passed since I decided to start a blog of my favorite tried and true recipes. Looking back over this past year, I can already see a huge difference in my blogging abilities, and in my cooking as well. Although most of the recipes I posted, I had already been making for a long time, it's still so amazing to see how my cooking skills, and confidence in the kitchen has grown.
Seriously, 10 years ago, I was an amateur in the kitchen. I knew the basics of cooking, but was no where near where I am today. During this past year, with this blog and my readers as my motivation, I have become exactly who I want to be in the kitchen: fearless. I am no longer afraid to try new cooking and baking techniques, and make up (and share) my own recipes. I was always afraid of trying new things and failing miserably. Now, I know that is all a part of learning and mastering the art of cooking. If I fail, I learn from my mistakes, and either try it again, and/or modify the recipe to what I believe will work.
For this coming year of blogging, I hope to continue on my path of learning, and to further explore more difficult cooking/baking techniques that I have always wanted to master.
Thank you so much to all my friends who read my blog and try my recipes! You are a true inspiration to me!

So, for my first blogiversary, I decided to make myself some special salted caramel cupcakes. My absolute favorite flavor. This recipe is SO, SO good. The cake is a light, sweet brown sugar flavor, the caramel filling is to die for, and the salted caramel buttercream just puts it over the top. So unbelievably delicious. I hope you enjoy this recipe!


Salted Caramel Cupcakes
(recipe adapted from 52 Kitchen Adventures)
Makes 12-15 cupcakes


Brown Sugar Cupcakes:

1 1/2 cups all-purpose flour
1 tsp baking powder
1/4 tsp sea salt (I used fine)
1/2 cup unsalted butter, at room temperature
1 cup, plus 2 T light brown sugar, packed
2 large eggs, at room temperature
1 tsp vanilla
1/2 cup, plus 2 T buttermilk


Preheat oven to 325 degrees. Line 12-15 muffin cups with paper or foil liners.

In a medium sized bowl, whisk together the flour, baking powder and salt; set aside.

In the bowl of an electric mixer, cream together the butter and salt, until light and fluffy. Add the eggs, one at a time, mixing well after each. Mix in the vanilla.
Add half the flour mixture to the wet ingredients, mix, then add half of the buttermilk, and mix again. Repeat with the remaining flour and buttermilk. Mix until well incorporated.

Divide the batter among the prepared baking cups, filling 3/4 full. If only making 12, there will be left over batter.
Bake for about 22-25 minutes or until a toothpick inserted in the middle comes out clean. Cool completely on wire racks.


Salted Caramel Filling:

1/2 cup granulated sugar
3 T salted butter, cubed
1/4 cup, plus 1 T heavy cream, at room temperature


In a small saucepan over medium heat, cook the sugar until melted, stirring frequently with a whisk, about 5 minutes. When the sugar turns a deep amber color, add the butter and stir until melted. Remove from heat and then slowly add the heavy cream, whisking until smooth. Let cool and thicken, about 20 minutes or so.

Once caramel is cooled, use a paring knife or large pastry tip to cut out a small round piece out of the top of each cupcake. Pour about 1-2 tsp of filling into each cupcake, and then replace the cake round on top of the caramel.


Salted Caramel Buttercream Frosting

1/4 cup granulated sugar
2 T water
1/4 cup heavy cream, at room temperature
1 tsp vanilla
1/2 cup salted butter, at room temperature
1/2 cup unsalted butter, at room temperature
3/4 tsp sea salt (start with 1/2 tsp and then add more to your desired taste--I found 3/4 tsp to be the best raitio of sweet and salty for me)
1 3/4 cup confectioners' sugar


In a small saucepan over medium-high heat, bring the sugar and water to a boil. Boil WITHOUT stirring, until it turns amber in color, about 5 minutes (be careful, it will change color quickly).
Remove from the heat and slowly add the heavy cream and vanilla, whisking well, until smooth.
Let cool until barely warm, but still pourable, about 20 minutes or so.

Meanwhile, in the bowl of an electric mixer, beat the butter and salt until light and fluffy. Add the powdered sugar and mix until thoroughly combined and smooth. Pour in the cooled caramel and mix until light and airy (if the frosting seems runny, then the caramel was too warm when it was added--refrigerate for 15-20 minutes until frosting is stiffer).

Spread or pipe frosting onto the filled cupcakes. Enjoy!!


Wednesday, January 11, 2012

Tomato, Sausage and Spinach Risotto

I found this recipe recently and couldn't wait to make it. I love risotto and so does my family. Although I wouldn't consider this to be a "quick-fix" meal, it can definitely be made within an hour, so this is still a good weeknight meal.
The flavor of this dish is just amazing. You will not be disappointed, but don't just take my word for it...my husband said "You can make this meal every day and twice on Sunday's if you want...."
Yup, I think this recipe is a keeper! :)


Tomato, Sausage and Spinach Risotto
(recipe adapted from Bev Cooks)
Serves 8 (can be halved to serve 4)

2 T extra virgin olive oil
1 medium sized sweet onion, diced
6 Italian sausage links, casings removed (I used Italian chicken sausage)
1 cup dry white wine
2 cups Arborio rice
1- 28 oz can of petite diced tomatoes, do not drain
4-5 cups chicken broth (I used low-sodium)
10 oz baby spinach
2 T butter
1 cup freshly shredded parmesan cheese (I cheated and used store-bought shredded parmesan)
Kosher salt
Fresh cracked black pepper


In a saucepan, bring the chicken broth and tomatoes (with their juices) to a light simmer.

Heat the oil in a large skillet over medium-high heat. Add the sausage, cook and crumble for about 3 minutes. Add the onion and continue to cook until sausage is cooked through and onion is tender, about 3 more minutes or so.

Add the rice and toss to coat. Cook and stir for one minute.


Add the wine, stir, and let simmer until most of it is absorbed, about one minute.

Reduce the heat to medium-low. Ladle about one cup of broth (and tomatoes) into the rice mixture and stir. Continue to cook and stir slowly until most of the liquid is absorbed. Then add another ladle of broth and repeat. Continue until most of the broth is used and the rice is tender and creamy, about 30 minutes.


Remove from the heat and then add the butter and parmesan cheese. Stir until both are melted. Then add the spinach and stir until it's wilted. Season as desired with salt and pepper.
Garnish with more parmesan on top of each serving. Enjoy!


Wednesday, January 4, 2012

Garlic Mac 'n Cheese with Smoked Chicken Sausage

Happy New Year! I've been on the hunt lately for new, scrumptious, family-friendly meals, that can be made ahead of time, or in less then 30 minutes. I've recently started working (after 9 years of being a stay-at-home mom!), so my time in the kitchen has been dramatically reduced. 

There are so many different flavors of 'fully cooked' or smoked chicken sausage available now in grocery stores, and using this type of sausage can be a huge time-saver. I happen to like certain brands more then others, and only buy sausage that is 100% natural and doesn't contain msg.

This "glorified" mac 'n cheese recipe is super yummy, can be made ahead (cover and refrigerate overnight before baking), and is very easy to throw together. My family and I loved this and I will be making it again and again. Even the leftovers were awesome. You have to try this!


Garlic Mac 'n Cheese with Smoked Chicken Sausage
(recipe generously adapted from Amanda's Cookin')
Serves 8 (recipe can easily be halved for smaller families)

1 box whole wheat rotini pasta
18 oz fresh or frozen small sugar snap peas (about 2 1/2 cups), cooked
6 T unsalted butter
1 small onion, finely diced
6 T all-purpose flour
2-3 fresh garlic cloves, finely minced
3 cups low fat milk (I use 1%)
1/4 tsp garlic powder
1/4 tsp dried Italian seasoning
1 tsp kosher salt (or to taste)
1/4 tsp black pepper
1/2 cup shredded cheddar cheese (I use reduced fat 2%)
1 3/4 cups shredded Italian cheese blend, divided (I use reduced fat 2%)
2 - 9 oz packages of fully cooked smoked Italian chicken sausage, sliced into moons


Preheat oven to 375 degrees. Lightly spray a baking dish with nonstick spray.

Cook pasta according to package directions for 'al-dente'; drain.

In a large saucepan over medium-high heat, melt the butter. Add the onion, stir and cook until tender, about 3 minutes. Add the garlic and cook for an additional minute.
Whisk in the flour and cook for about 1-2 minutes. Slowly whisk in the milk. Add the salt, pepper, Italian seasoning and garlic powder, and bring to a boil. Simmer uncovered over medium heat for about 1 minute, stirring frequently, or until mixture is slightly thickened. Stir in the cheddar cheese and 1 cup of the Italian cheese blend, until smooth.

Add the pasta back to the pot used to cook it in. Then add the cooked sugar snap peas and the sliced chicken sausage. Add the cheese sauce and mix well. Pour into the prepared baking dish. Sprinkle remaining Italian cheese blend over the top of the pasta.

Bake, uncovered, for about 20 minutes, or until hot, bubbling and cheese is golden brown on top. Enjoy!


Tuesday, December 27, 2011

Chocolate Hazelnut Twists

I made this super yummy and super easy treat for my husband, for breakfast, Christmas morning (along with pumpkin spiced pancakes). If you love Nutella (who doesn't??) and hazelnuts, then you must make these very soon!


Chocolate Hazelnut Twists
(recipe adapted from Pillsbury.com)

2 cans (8 oz each) Pillsbury refrigerated crescent dinner rolls (or 2 cans of the Pillsbury seamless dough sheets)
1/2 cup Nutella
1/2 cup finely chopped hazelnuts
Powdered sugar, for garnish, optional


Preheat oven to 375 degrees. Spray a 12-cup muffin pan with baking spray (you'll use only 8 cups though).

Unroll one can of dough on a very lightly floured work surface. Firmly press together perforations if using regular crescent rolls. Press into a 13x7 rectangle.
Spread Nutella evenly over the dough, to 1/4 inch on the sides. Sprinkle chopped hazelnuts on top of the Nutella.

Unroll remaining can of dough; seal perforations. Press into a 13x7 rectangle as well. Place over filling, and press together the edges firmly to seal.
Cut in eight (13 inch) strips. Twist each strip about 5 or 6 times. Shape into a tight coil and place one in each of the prepared muffin cups (muffin cups will be full).

Bake for about 20 minutes or until golden brown. Remove immediately from pan to wire racks and let cool for about 5 minutes. Sprinkle with powdered sugar, if desired. Serve warm. Enjoy!