Pages

Showing posts with label Dessert. Show all posts

Monday, August 27, 2012

No-Bake Biscoff Chocolate Chunk Cookies

Traditional no-bake cookies are one of my husband's favorites (recipe here), but I have been on the search for a great peanut-free version of these cookies that would be school friendly, and I finally found one! Using Biscoff spread instead of peanut butter is a great alternative. The cookies have a great flavor and I happen to like these better because they are not quite as sweet (but trust me, they are still plenty sweet!). You must try these if you like no-bake cookies!


No-Bake Biscoff Chocolate Chunk Cookies
(recipe adapted from Picky Palate)
Makes about 40 cookies

8 T unsalted butter
2 cups granulated sugar
1 cup heavy cream
1 cup Biscoff (can use peanut butter)
3 cups quick oats
1/2 cup marshmallow bits (I used mini marshmallows that I chopped)
1 3/4 cups semi-sweet or milk chocolate chunks
 
 
In a large saucepan over medium heat, combine the butter, sugar and heavy cream. Heat, stirring frequently, and bring to a boil. Let boil for 2 minutes while stirring constantly. Remove from heat.
 
Stir in the biscoff until melted and smooth. Add the oats and marshmallows, stir well.
 
Add the chocolate chunks and only stir a few times so all of the chocolate doesn't melt (or you can keep stirring, if you like the chocolate to be completely melted).
 
Use a cookie scoop to scoop cookies onto wax or parchment paper. Let set for at least 30 minutes. Enjoy!


Tuesday, July 31, 2012

Chocolate Cupcakes

I shared with you my favorite vanilla cupcake recipe, now I would like to share my most favorite homemade chocolate cupcake. This recipe is just fabulous. The chocolate cake is flavored perfectly and the texture is amazing. This is my go-to chocolate cupcake recipe. It will not let you down! I paired these cupcakes recently with a whipped vanilla buttercream frosting that is soo good and is definitely a new favorite in our house! The frosting recipe is included below!


Chocolate Cupcakes
(recipe from annie's eats)
Makes 24 cupcakes

1/2 cup plus 1 T Dutch-process cocoa powder
1/2 cup plus 1 T hot water
2 1/4 cups all-purpose flour
3/4 tsp baking soda
3/4 tsp baking powder
1/2 tsp salt
2 sticks plus 1 T unsalted butter, room temperature
1 2/3 cups sugar
3 large eggs, room temperature
1 T vanilla extract
3/4 cup sour cream (full fat)


Preheat the oven to 350 degrees. Line cupcake pans with paper liners.

In a small bowl, combine the cocoa powder and hot water, and whisk until smooth. In a separate small bowl, whisk together the flour, baking soda, baking powder, and salt; set aside.

In a medium sized saucepan over medium heat, combine the butter and sugar. Cook, stirring occasionally, until the mixture is smooth and the butter is completely melted. Transfer the mixture to the bowl of an electric mixer and beat on medium-low speed until the mixture is cool, about 5 minutes or so.
Add the eggs one at a time, mixing well after each addition. Add the vanilla and then the cocoa mixture and mix until smooth.
With the mixer on low speed, add the flour mixture, alternating with the sour cream, beginning and ending with the dry ingredients. Mix each addition just until incorporated.

Divide the batter evenly between the prepared liners. Bake until a toothpick inserted in the center comes out clean, about 15-20 minutes. Let cool in the pan about 5-10 minutes, then transfer to a wire rack to cool completely. Frost with favorite frosting! Enjoy!


Whipped Vanilla Buttercream Frosting
(recipe from annie's eats)
Frosts 24 cupcakes

1 1/2 cups plus 2 T (3 sticks plus 2 T) unsalted butter, room temperature
3 cups confectioners’ sugar
Pinch of salt
1 vanilla bean, split lengthwise (optional)
2 T heavy cream
1 T vanilla extract

Using an electric mixer, whip the butter on medium speed until smooth, about 1 minute. Add the confectioners’ sugar to the bowl and mix on medium-low speed just until incorporated. Scrape the seeds from the vanilla bean pod (if using) into the bowl and add in the salt.
Beat on medium-high speed until smooth, about 1-2 minutes. Add the heavy cream and vanilla while on low speed, just until incorporated. Then whip on medium-high speed until light and fluffy, scraping down the bowl as needed, about 4-5 minutes. Enjoy!


Monday, April 23, 2012

The Ultimate Vanilla Cupcake

I've eaten a lot of different homemade vanilla cupcakes in my life, so I've tasted a fair share of good, bad, and great varieties. This vanilla cupcake recipe belongs in the BEST category. The cake is sweet, moist, has a wonderful vanilla flavor, and beautiful flecks of vanilla bean throughout. I loved these cupcakes even without frosting. This recipe will now be my go-to vanilla cupcake recipe, especially for parties or events. They are well worth the expense to make them, trust me!


The Ultimate Vanilla Cupcake
(recipe slightly adapted from cupcakeproject)
Makes 16-18 cupcakes

1 cup granulated sugar
1 vanilla bean
1 3/4 cups cake flour, not self-rising (I used Queen Guinevere from KAF)
1 1/2 tsp baking powder
1/2 tsp baking soda
1/2 tsp salt
1/4 cup unsalted butter, room temperature
2 large eggs, room temperature
1/3 cup full-fat sour cream
1/4 cup canola oil or vegetable oil
1 T pure vanilla extract
2/3 cup whole milk (for best flavor do not use reduced fat milk)

Directions:
Preheat oven to 350 degrees. Line 16-18 muffin tin cups with paper liners.

Split the vanilla bean lengthwise and scrape out all of the black seeds. In a small bowl, combine the granulated sugar with the vanilla bean seeds, using the back of a spoon to break up the clumps.

In a bowl of an electric mixer, combine the flour, baking powder, baking soda and salt. Add the sugar/vanilla bean mixture to the flour and mix well.

Add the softened butter to the flour mixture and mix on low speed. Because there is very little butter, the mixture will resemble fine crumbs when mixed.

In a small bowl, whisk together the eggs, sour cream, oil and vanilla. Add the egg mixture to the flour mixture and beat until combined.

Slowly add the milk to the batter while mixing on low speed. Continue until just combined. The batter will be quite thin and that is OK.

Fill the cupcake liners 1/2 full with batter.

Bake for 14 minutes or until a toothpick or cake tester comes out clean when inserted in the middle of each cupcake (I baked mine for about 17 minutes, but the baking time will depend on your oven). The cupcakes will be very light in color on top.

Remove the cupcakes immediately from the pan (still in the paper liners) and allow to cool completely before frosting.

To finish the cupcakes, frost with your favorite frosting. I chose to thinly frost my cupcakes with my favorite chocolate frosting found here. Enjoy!

Little flecks of vanilla bean throughout.


Friday, April 20, 2012

Coconut Cake

My husband requested that I make him a coconut cake this year for his birthday. He and I both love all things coconut, but I was a bit surprised by his slightly strange/random cake choice. He usually requests my chocolate chip pound cake, but this year he decided he needed a cake that was close to his heart. His mother used to make him a coconut cake every year for his birthday when he was growing up. After just spending a lot of time with his mother a couple of months ago, I'm not surprised my husband was feeling a little nostalgic. I would be worried if he wasn't. So, I found this AWESOME recipe from King Arthur Flour and it was SO good. The cake is so coconut-y, sweet, soft, moist, and delicious. My husband loved it and declared that this cake was exactly what he was wishing for.


Coconut Cake
(recipe adapted from King Arthur Flour)

For the cake:
3 cups cake flour (I used Queen Quinevere cake flour from KAF)
2/3 cup coconut milk powder (found at KAF or fine whole food stores)
1/2 tsp salt
4 tsp baking powder
1/2 cup plus 2 T unsalted butter
1 1/2 cups granulated sugar
6 large egg whites (the equivalent in packaged egg whites is ok)
1 1/2 cups whole milk, at room temperature
1 1/2 tsp vanilla extract
4 drops or 1/4-1/2 tsp coconut flavoring

For the frosting*:
1- 14 oz can unsweetened coconut milk
1/2 cup unsalted butter, room temperature
5 1/2 cups confectioners’ sugar, divided
1/2 tsp salt
3 to 4 drops or 1/2 tsp coconut flavoring (or can use 1 tsp vanilla if you don't want the coconut flavor too strong)

For garnish:
1 1/2 cups sweetened shredded coconut

*I recommend starting the frosting before you make the cake.

To make the cake:
Preheat the oven to 350 degrees. Spray two 8 or 9 inch round or square baking pans with nonstick baking spray; set aside. If using cake strips, soak them.

In a medium sized bowl, whisk together the cake flour, coconut milk powder, baking powder and salt; set aside.

In the bowl of an electric mixer, cream together the butter and sugar until the mixture is extremely light and fluff, for two minutes. Then scrape down the sides and bottom of the bowl. Beat for at least three minutes more. Add 1/4 of the dry ingredients, mix until combined, and scrape the mixing bowl.

Combine the egg whites, milk, and coconut flavoring in a small bowl. Add 1/3 of the egg mixture to the butter mixture, mix until just combined. Continue adding dry and wet ingredients by turns, until all are incorporated. Scrape down the sides and bottom of the bowl, and mix for one more minute.

Divide the batter between the two pans, and wrap the outsides with the soaked cake strips. If you don’t have cake strips, place the pans in larger pans and fill the water halfway up the sides of the pans. Bake for 30 to 35 minutes, until the cake starts to pull away from the sides of the pan, and when a cake tester inserted comes out clean.

Remove the cakes from the oven and place on a wire rack. Remove the cake strips or take the pans out of the water. Let the cakes cool for 20 minutes, then turn out of the pan and return to the wire rack to finish cooling completely before filling and frosting.

To make the frosting:
Set a fine-mesh strainer or colander over a bowl or large measuring cup and line it with a clean linen towel or cheesecloth. Pour the coconut milk into the lined strainer and let the coconut water drain for up to 2 hours (it only took about an hour when I did it). After draining you should have a thick lump of cream left.
Once the coconut milk has drained, cream the butter with 2 cups confectioners’ sugar in a large bowl using an electric or hand mixer. Beat in the salt and coconut flavoring (or vanilla) until the mixture is smooth. Add the coconut cream and mix, scraping the bottom and sides of the bowl. Add the remaining confectioners' sugar and mix until the frosting is smooth and spreadable (if frosting seems to be too thin, add a little more confectioners' sugar until desired consistency is achieved). Cover and hold at room temperature until ready to use (I did place my frosting in the fridge for about 20 minutes because it was very soft).
When the cakes are cool, cut each in half horizontally, creating four layers. Place one layer on serving plate and cover with 1/4 of the frosting. Place another layer on top and cover with 1/4 more of the frosting. Repeat until all the layers are frosted (including the sides).
To garnish cake: sprinkle sweetened coconut flakes all over the top and sides of cake.


I recommend storing the cake in the refrigerator, loosely covered. Take the cake out about 15 minutes before serving. Enjoy!

Friday, April 6, 2012

Mini Shortbread Fruit Tarts

I am SO behind with blog posts! I can't believe Easter in only a few days away. This recipe will definitely be a cute addition to your Easter meal or for Mother's Day!

My oldest son recently studied Medieval times in his fourth grade class. At the end of this unit the entire fourth grade got together to have a HUGE Medieval feast. It was awesome. Parents were organized to make and bring Medieval style foods for the feast. There was SO much great food, it was awesome. The feast was a huge success and I am giving big props to Mrs. Allen (one of the fourth grade teachers) for organizing everything.....you rock!
So, one of the courses I made for the feast was chicken wings. I decided to make my friend Andrea's fabulous recipe for maple chicken wings (recipe found here), and they were a big hit!
I also made some wonderful mini shortbread fruit tarts for the dessert course. They were sooooo good! The shortbread shell was buttery and slightly sweet, the lemon no-bake cheesecake style filling was so creamy and perfect, and the fresh fruit on top tied everything together. Major success.
I ended up making a TON of these little tarts because our church's annual Ladies Tea was the following day after the Medieval feast. All the ladies at the tea loved the little tarts and many asked for the recipe. I love it when recipes are a hit!


Mini Shortbread Fruit Tarts
(recipe adapted from joyofbaking.com, and laurenslatest) 

For the Shortbread Tarts:

1 cup unsalted butter, softened
1/2 cup confectioners' sugar
1 tsp vanilla
1 1/2 cups all-purpose flour
3 T cornstarch (or 6 T more all-purpose flour)
1/4 tsp salt

For the cream cheese filling*:

1- 8 oz package full fat cream cheese, softened
1- 14 oz can sweetened condensed milk
Zest of one lemon (about a full teaspoon)
1/3 cup fresh lemon juice (from 2 large or 3 small lemons)
1 tsp vanilla
Fresh raspberries, blueberries, strawberries or other cut up fruit
* For great alternative filling for these tarts, especially for younger kids, combine a package of vanilla instant pudding with 1 1/2 cups of milk, set aside. Whip 1/2 cup of heavy cream with 1/2 tsp vanilla extract in a separate bowl, until stiff peaks form. Gently fold the whipped cream into the thickened pudding. Store in an air tight container in the refrigerator until ready to use--up to a few
days in advance.

Directions:
For the cream cheese filling:
In the bowl of an electric mixer (hand mixer is fine), or food processor, beat the cream cheese until creamy and smooth. Add the condensed milk, lemon zest, lemon juice, and vanilla, and mix until smooth. Transfer the filling to an airtight container and refrigerate for at least 4-6 hours so the filling will thicken and not be as runny. This filling can actually be made a few days, or up to a week in advance, as long as it's kept sealed and cold.

For the shortbread tarts:
In the bowl of an electric mixer, beat the butter and confectioners' sugar until smooth, and then add the vanilla, mixing well.
Add the flour, cornstarch (or extra flour) and salt. Mix until the dough is just incorporated and forms a soft dough (don't over mix). Wrap the dough in plastic wrap and refrigerate for about 15 minutes or so, until the dough is firm enough to easily roll into balls.

When the dough is ready, preheat the oven to 325 degrees.
Spray 36 mini muffin tin cups with non-stick baking spray.
Take a scant 1 tablespoon of shortbread dough and roll into a ball (doesn't have to be perfect) and place it in the prepared muffin pan. Gently press the dough with your fingertips onto the bottom and up the sides of the muffin cup. Repeat this for all of the cups (you should get 30-36 shells).
Once all the tarts are made, cover the muffin tins with plastic wrap and place in the freezer for about 10-15 minutes so the shortbread can become firm.

Remove the plastic wrap from the tarts and bake in the preheated oven for 18-20 minutes or until lightly golden brown. About half way through the cooking time, remove the pan(s) from the oven and gently prick each tart with the tines of a fork to help limit the amount the shortbread puffs up.
When the tarts are done, remove from the oven onto a wire rack and allow to cool completely before trying to remove the tarts from the pan.
Once cool, a good trick to getting the tarts out of the pan, is to spin each one to loosen and then gently lift them out. Shortbread is very fragile, so be sure to have a very gentle hand!


When ready to serve (or up to a couple hours in advance prior to serving), pipe or spoon filling into each tart. Then top each tart with fresh berries or other cut up fruit. Store in the refrigerator until ready to serve. Enjoy!

Thursday, March 8, 2012

Chocolate-Pecan Chess Pie

We just returned home from a wonderful two week vacation visiting our family and friends in Tennessee. We had so much fun and the weather was perfect! It was hard to come back home to snow and freezing temperatures....we already miss seeing green grass and daffodils!
While in TN, we ate a lot of great southern foods. We are so lucky to have some great cooks in our family. My sister-in-law, Ginny, makes the most delicious BBQ (pulled pork), which she made for us for dinner after church one Sunday. I was happy she shared her recipe with me and I hope to make it soon.
We also visited our Great-Aunt Mary (who is 87 years young!), and she made us her famous chess pie, which I make every year (here's the recipe), but I can never seem to make it taste as good as hers. It must be because I don't have her sweet southern charm. Love you Aunt Mary!

Another thing my family loves to eat when we visit the south are candied pecans. We buy them fresh from vendors. They are warm, sweet, crunchy and oh, so good. A wonderful treat!
When I found this chocolate-pecan chess pie recipe, I just knew it was going to be a winner. I've made chocolate chess pie before (I prefer the classic version though), but this pie has the added candied pecans on top which made it sound so good. The result is SO delicious! This chocolate chess pie is soft, super sweet, and decadent....and the crunchy candied pecans are an amazing addition. My family absolutely loved this pie and I will be making it a lot!


Chocolate-Pecan Chess Pie
(recipe slightly adapted from Southernliving.com)

For the pie:
1- 9 inch unbaked pie crust, homemade or store bought
1/2 cup unsalted butter
2- 1 oz unsweetened chocolate baking squares* (I used a substitute, see below)
1- 5oz can evaporated milk
2 large eggs
1 tsp vanilla
1 1/2 cups granulated sugar
3 T unsweetened cocoa powder
2 T all-purpose flour
1/8 tsp salt

For the pecan topping:
1 1/2 cups pecan halves and pieces (I used halves)
2/3 cup light brown sugar, packed
1 T (generous) light corn syrup
1 tsp vanilla

*If you don't have unsweetened baking chocolate, you can substitute 3 T of unsweetened cocoa powder and 1 T of unsalted butter for every 1 ounce of the unsweetened baking chocolate squares. You would need a total of 6 T of cocoa powder and 2 T of unsalted butter for this recipe (which is in addition to the other butter and cocoa in the recipe).

Directions:
Preheat oven to 350 degrees.

Line a 9 inch pie plate with the unbaked pie crust. Crimp or flute the edges.

In a small saucepan over medium heat (or in the microwave), melt the butter and chocolate baking squares, stirring frequently (if using the cocoa powder as a substitute, only melt all of the butter--the cocoa will be mixed with the other dry ingredients).

Pour the butter/chocolate mixture into a large mixing bowl. Whisk in the evaporated milk, eggs and vanilla.

In a small, separate mixing bowl, whisk together the granulated sugar, cocoa powder, flour and salt. Add the sugar mixture to the butter mixture and whisk until smooth. Pour into the prepared unbaked pie crust.

Bake for about 40 minutes. Meanwhile, mix together all of the pecan topping ingredients in a small bowl. Remove the pie from the oven after about 38-40 minutes and sprinkle the pecan topping over the top of the pie. Continue to bake for another 10 minutes, or until the pie is completely set.

Cool on a wire rack for at least an hour before cutting. Serve with sweetened whipped cream and drizzled caramel, if desired! Enjoy!


My husband likes LOTS of caramel :)

Thursday, February 16, 2012

A Special Chocolate Cake

On February 13, 2012, it was the 10th anniversary of my mom's passing. It was a hard day. Harder then any other anniversary so far. It was just so hard to believe that a full decade had passed. Where did the time go? And why does it still feel like it was only yesterday that we lost her?
(For those of you that don't know, my mom was a Type-1 diabetic. She lost her life-long battle with the terrible disease at the young age of 50).

My sister and I decided to get together, along with our families, to have a big dinner to celebrate our mom's life. I made mom's favorite spaghetti with meat sauce, along with salad and garlic bread. Then for dessert I made her a special chocolate cake. How was the cake special you ask? Well, my mom loved to bake. She would make the best treats for us, but could never eat any of them, because of her diabetes. Throughout our childhood, mom would often joke to my sister and I that her one wish in life was be to bake herself the biggest, richest chocolate cake, and then eat the entire thing herself.

So, I decided to finally make her that rich, decedent, over-the-top, chocolate cake she always wanted. I believe this cake would have made her so very happy, even if she could have only had just one bite.  Please enjoy this recipe, in honor of my mom :)


Favorite Fudge Birthday Cake
(recipe adapted from King Arthur Flour)

For the cake:

2 cups granulated sugar
2 cups all-purpose flour
2 T cornstarch (I used more all-purpose flour)
3/4 cup dutch-process cocoa
2 tsp baking powder
2 tsp espresso powder (optional, as a flavor enhancer, but I highly recommend using it)
1/2 tsp baking soda
1 tsp salt
4 large eggs
3/4 cup vegetable oil
2 tsp vanilla extract
1 1/4 cups water

For the filling:

12 ounces semi-sweet chocolate, chopped (about 1 1/2 cups)
6 ounces heavy cream

For the icing:

8 ounces semi-sweet chocolate, chopped (about 1 cup)
4 ounces heavy cream


Directions:

Preheat oven to 350 degrees. Spray two 8 X 2 inch round cake pans with non-stick baking spray. If you do not have 8 inch cake pans that have 2 inch high walls, use 9 inch round pans instead.

In the bowl of an electric mixer, combine the sugar, flour, cornstarch, cocoa, baking powder, espresso powder, baking soda and salt. Mix well.

Add the eggs, oil, vanilla and water. Mix well until smooth.

Pour the batter evenly into each of the prepared pans. Bake the cakes for 35-38 minutes, or until a toothpick or cake tester, inserted in the middle, comes out clean.

Cool the cakes for at least 15 minutes in the pans before removing to wire racks to cool completely.

Once cool, use a long serrated knife to cut both of the cakes in half horizontally, resulting in 4 cake layers.

Next, make the filling. Heat the 6 ounces of heavy cream and 12 ounces of chocolate in a saucepan or in a microwavable dish, until hot and the chocolate is very soft. Stir until the mixture turns into a smooth, thick ganache.

Place one cake layer on a serving plate (if desired, cut strips of parchment paper and place under the edges of the cake to catch any drips).
Spread 1/3 of the ganache filling over the bottom layer of cake, but don't spread it all the way to the edge.
Add the second layer of cake and top with another 1/3 of the filling. Repeat with the third layer of cake and remaining filling.
Top with the remaining cake layer.

Then, make the icing. Heat the 4 ounces of heavy cream and the 8 ounces of chocolate in a small saucepan or in the microwave until hot and the chocolate is very soft. Stir until the mixture turns into a smooth, thick ganache, just like the filling.

Pour and spread the icing over the top of the cake, letting it drip down the sides. Once it's done dripping, smooth the sides with a spatula, if desired. (At this point, I topped my cake with shaved dark chocolate for decoration).

Pull out the parchment strips from under the bottom layer of cake. Allow the cake to rest, covered with a cake cover or large bowl, until the chocolate is set. Overnight is the best, but several hours would be ok.

Cut the cake, serve and enjoy!


Friday, February 10, 2012

Dark Chocolate Hazelnut Truffles

It's almost Valentine's Day! I like to bake my husband special things throughout the year, but for Valentine's Day, I devote all  of my energy to making him something totally chocolate. I can't think of a better way to achieve that then with truffles!
My husband loves Lindt hazelnut truffles so I decided to make him a homemade version of them. I think they came out awesome. The only change I would make next time is to either up the amount of the hazelnut liqueur, or try using a bolder hazelnut flavoring, like this one that I found at KAF. I just think the hazelnut flavor in the filling of these truffles is a little weak, but they are still super yummy! I know my husband is going to love them!


Dark Chocolate Hazelnut Truffles
(recipe adapted from Smitten Kitchen who adapted it from Ina Garten)

1 cup hazelnuts, chopped
3 1/2 ounces good bittersweet chocolate (about 1/2 cup)
3 1/2 ounces good semisweet chocolate (about 1/2 cup)
1/2 cup heavy cream
1 1/2 T hazelnut liqueur (I used Frangelico)
1 T prepared coffee (warm is ok)
1/2 tsp good vanilla extract


Preheat the oven to 325 degrees.

Place chopped hazelnuts on a baking sheet (I lined mine with foil). Roast for about 10-15 minutes until fragrant. Set aside to cool.

Coarsely chop the bittersweet and semisweet chocolate and place in a medium sized bowl (try to use a bowl that can either be microwaved or used as a double-boiler).

Heat the cream in a sauce pan or in the microwave until boiling. Immediately pour the hot cream over the chopped chocolate. Using a wire whisk, stir the chocolate and cream until the chocolate is completely melted and smooth (if the chocolate doesn't completely melt, place the bowl over simmering water-like a double-boiler, or microwave at 50% power for 30 second intervals, until it's completely melted).

Whisk in the hazelnut liqueur, coffee and vanilla. Cover the chocolate and refrigerate until firm enough to scoop, about an hour or so.

Scoop out small dollops of chocolate and roll into balls using your hands. Work quickly because the chocolate will melt. Place chocolate balls onto a wax or parchment lined baking sheet. Refrigerate again for 15 minutes or so until the chocolate has firmed up again.

Roll the chocolate balls in the toasted hazelnuts, lightly pressing them into the chocolate so they stick. At this point the truffles are finished and can be stored in the refrigerator, but I decided to dip them in melted chocolate as well. I melted some dark chocolate candy melts, dipped the truffles in it and then sprinkled a few chopped hazelnuts on top. I think they came out very pretty. You could also just drizzle a little melted chocolate over the top as more of a garnish. Whatever way you decide to make them, they are sure to be fabulous!  Enjoy!


Friday, January 13, 2012

Salted Caramel Cupcakes--Happy Blogiversary To Me!

Wow, today my blog turns one! I can't believe an entire year has passed since I decided to start a blog of my favorite tried and true recipes. Looking back over this past year, I can already see a huge difference in my blogging abilities, and in my cooking as well. Although most of the recipes I posted, I had already been making for a long time, it's still so amazing to see how my cooking skills, and confidence in the kitchen has grown.
Seriously, 10 years ago, I was an amateur in the kitchen. I knew the basics of cooking, but was no where near where I am today. During this past year, with this blog and my readers as my motivation, I have become exactly who I want to be in the kitchen: fearless. I am no longer afraid to try new cooking and baking techniques, and make up (and share) my own recipes. I was always afraid of trying new things and failing miserably. Now, I know that is all a part of learning and mastering the art of cooking. If I fail, I learn from my mistakes, and either try it again, and/or modify the recipe to what I believe will work.
For this coming year of blogging, I hope to continue on my path of learning, and to further explore more difficult cooking/baking techniques that I have always wanted to master.
Thank you so much to all my friends who read my blog and try my recipes! You are a true inspiration to me!

So, for my first blogiversary, I decided to make myself some special salted caramel cupcakes. My absolute favorite flavor. This recipe is SO, SO good. The cake is a light, sweet brown sugar flavor, the caramel filling is to die for, and the salted caramel buttercream just puts it over the top. So unbelievably delicious. I hope you enjoy this recipe!


Salted Caramel Cupcakes
(recipe adapted from 52 Kitchen Adventures)
Makes 12-15 cupcakes


Brown Sugar Cupcakes:

1 1/2 cups all-purpose flour
1 tsp baking powder
1/4 tsp sea salt (I used fine)
1/2 cup unsalted butter, at room temperature
1 cup, plus 2 T light brown sugar, packed
2 large eggs, at room temperature
1 tsp vanilla
1/2 cup, plus 2 T buttermilk


Preheat oven to 325 degrees. Line 12-15 muffin cups with paper or foil liners.

In a medium sized bowl, whisk together the flour, baking powder and salt; set aside.

In the bowl of an electric mixer, cream together the butter and salt, until light and fluffy. Add the eggs, one at a time, mixing well after each. Mix in the vanilla.
Add half the flour mixture to the wet ingredients, mix, then add half of the buttermilk, and mix again. Repeat with the remaining flour and buttermilk. Mix until well incorporated.

Divide the batter among the prepared baking cups, filling 3/4 full. If only making 12, there will be left over batter.
Bake for about 22-25 minutes or until a toothpick inserted in the middle comes out clean. Cool completely on wire racks.


Salted Caramel Filling:

1/2 cup granulated sugar
3 T salted butter, cubed
1/4 cup, plus 1 T heavy cream, at room temperature


In a small saucepan over medium heat, cook the sugar until melted, stirring frequently with a whisk, about 5 minutes. When the sugar turns a deep amber color, add the butter and stir until melted. Remove from heat and then slowly add the heavy cream, whisking until smooth. Let cool and thicken, about 20 minutes or so.

Once caramel is cooled, use a paring knife or large pastry tip to cut out a small round piece out of the top of each cupcake. Pour about 1-2 tsp of filling into each cupcake, and then replace the cake round on top of the caramel.


Salted Caramel Buttercream Frosting

1/4 cup granulated sugar
2 T water
1/4 cup heavy cream, at room temperature
1 tsp vanilla
1/2 cup salted butter, at room temperature
1/2 cup unsalted butter, at room temperature
3/4 tsp sea salt (start with 1/2 tsp and then add more to your desired taste--I found 3/4 tsp to be the best raitio of sweet and salty for me)
1 3/4 cup confectioners' sugar


In a small saucepan over medium-high heat, bring the sugar and water to a boil. Boil WITHOUT stirring, until it turns amber in color, about 5 minutes (be careful, it will change color quickly).
Remove from the heat and slowly add the heavy cream and vanilla, whisking well, until smooth.
Let cool until barely warm, but still pourable, about 20 minutes or so.

Meanwhile, in the bowl of an electric mixer, beat the butter and salt until light and fluffy. Add the powdered sugar and mix until thoroughly combined and smooth. Pour in the cooled caramel and mix until light and airy (if the frosting seems runny, then the caramel was too warm when it was added--refrigerate for 15-20 minutes until frosting is stiffer).

Spread or pipe frosting onto the filled cupcakes. Enjoy!!


Tuesday, December 27, 2011

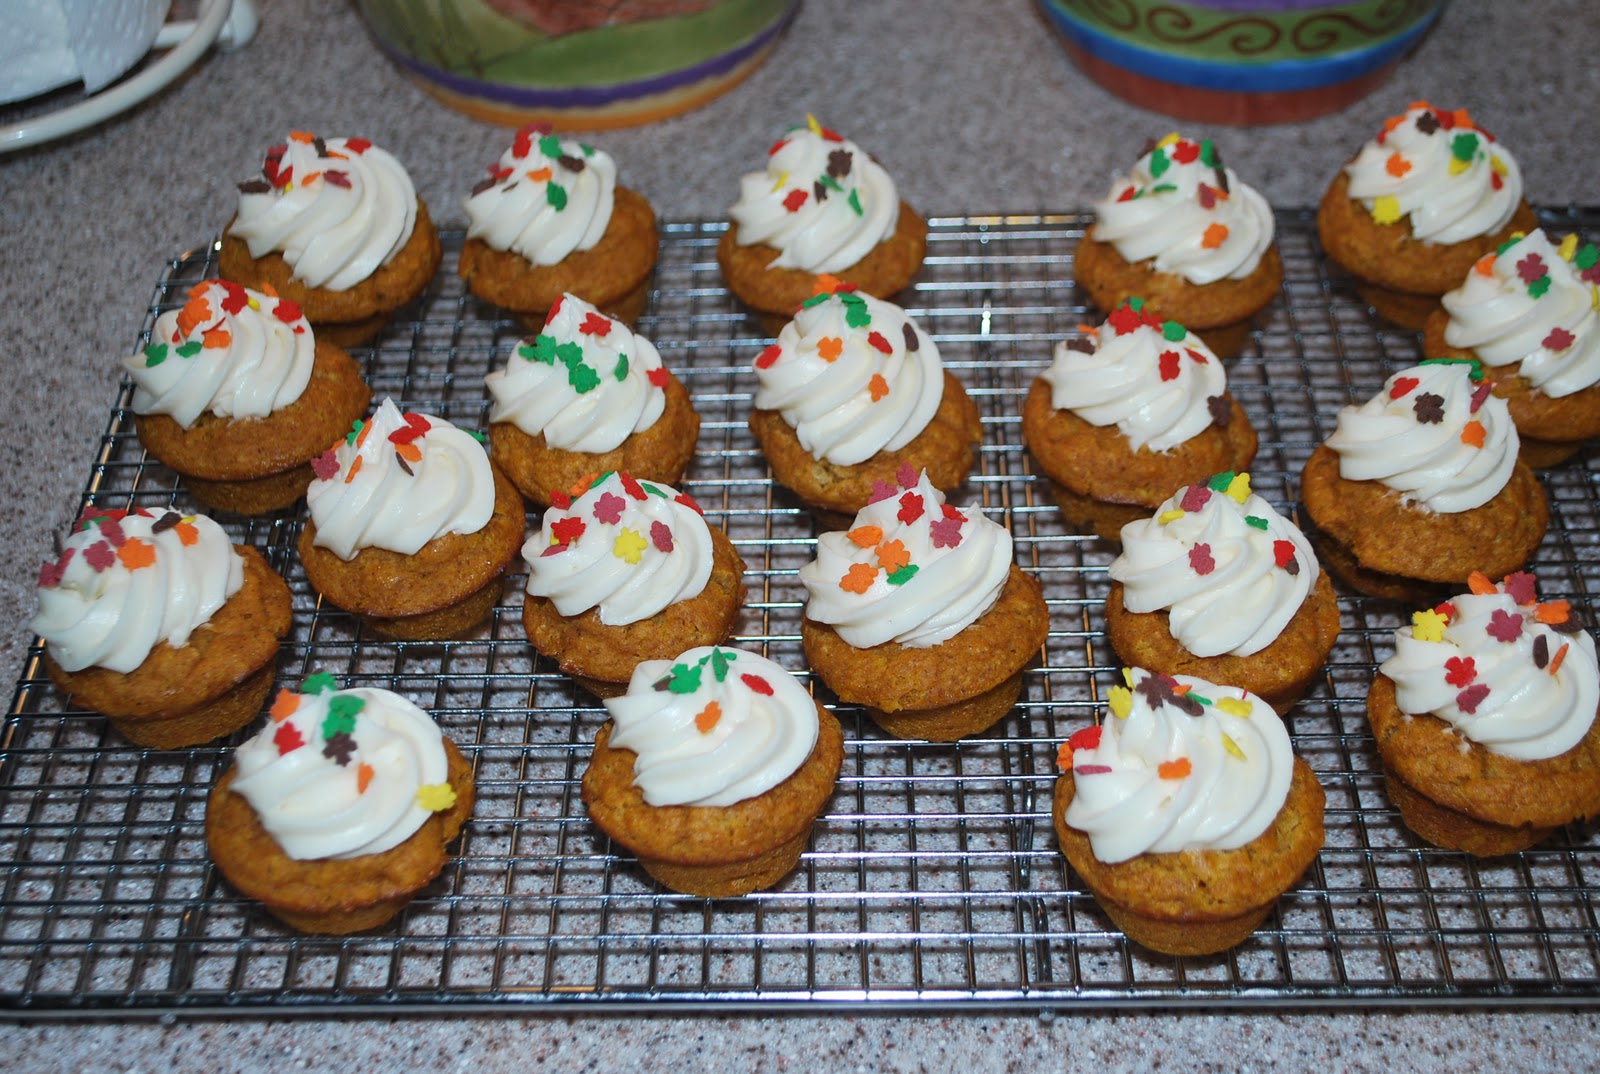
Chocolate Hazelnut Twists

I made this super yummy and super easy treat for my husband, for breakfast, Christmas morning (along with pumpkin spiced pancakes). If you love Nutella (who doesn't??) and hazelnuts, then you must make these very soon!

Chocolate Hazelnut Twists
(recipe adapted from Pillsbury.com)

2 cans (8 oz each) Pillsbury refrigerated crescent dinner rolls (or 2 cans of the Pillsbury seamless dough sheets)
1/2 cup Nutella
1/2 cup finely chopped hazelnuts
Powdered sugar, for garnish, optional


Preheat oven to 375 degrees. Spray a 12-cup muffin pan with baking spray (you'll use only 8 cups though).

Unroll one can of dough on a very lightly floured work surface. Firmly press together perforations if using regular crescent rolls. Press into a 13x7 rectangle.
Spread Nutella evenly over the dough, to 1/4 inch on the sides. Sprinkle chopped hazelnuts on top of the Nutella.

Unroll remaining can of dough; seal perforations. Press into a 13x7 rectangle as well. Place over filling, and press together the edges firmly to seal.
Cut in eight (13 inch) strips. Twist each strip about 5 or 6 times. Shape into a tight coil and place one in each of the prepared muffin cups (muffin cups will be full).

Bake for about 20 minutes or until golden brown. Remove immediately from pan to wire racks and let cool for about 5 minutes. Sprinkle with powdered sugar, if desired. Serve warm. Enjoy!

Friday, December 23, 2011

Tortilla Snowflakes and Andes Cookies

I spent a wonderful afternoon with my children baking and decorating cookies, sipping hot chocolate, and listening to Christmas music. I live for moments like these. We laugh, we joke, eat cookies (and frosting), and we sing along with the carols.....it's just so heart warming and such a blessing.


This year, we also made tortilla snowflakes, inspired by a post from Our Best Bites. I thought this was SUCH a great idea. My kids loved it and they had a blast making and eating them. I highly recommend you make these with your kiddos!


I made a ton of different types of cookies this year for Christmas. I even tried a few new recipes, and everything has come out great. Last year, I found a great recipe on a blog using Andes baking chips, but for some reason, I never bookmarked the page, and never wrote the recipe down. I bought more Andes baking chips to use this year, so I tried to track down the recipe, but had no luck. I was bummed, but still wanted to make something using these chips. So, I did something I don't normally do....I made the recipe that was on the package. The cookies came out really good! My whole family loved them and so did my husband's employees. This recipe is definitely a winner and I will be making them again.


Andes Creme de Menthe Chunk Cookies
(slightly adapted from the back of the Andes Creme de Menthe baking chips package)

1/2 cup salted butter, softened
3/4 cup dark brown sugar
1/2 cup granulated sugar
1 tsp baking soda
1 tsp baking powder
2 tsp vanilla
2 eggs
1 package (10 oz) Andes Creme de Menthe Baking Chips
2 2/3 cups all-purpose flour


In the bowl of an electric mixer, cream together the butter, brown sugar, granulated sugar, baking soda, baking powder, vanilla and eggs, until well mixed.
Stir in the Andes Baking Chips and then add the flour, mixing well.

Wrap the dough in plastic wrap and refrigerate for one hour.

Preheat oven to 350 degrees and position the oven rack to one level above the middle of the oven. Line baking sheets with parchment paper.

Scoop out about one tablespoon of dough, roll into a ball and place on the prepared baking sheet. Slightly flatten (using fingers is fine). Repeat with remaining dough.

Bake for 8-10 minutes (try not to over-bake). Let cool on baking sheet for two minutes before removing to wire racks.


Wishing everyone a very Merry Christmas and many blessings in the New Year!


Tuesday, December 20, 2011

Chocolate Crinkle Cookies--Egg, Dairy, and Nut Free

I made this cookie recipe for the first time last year, and I fell in love with it instantly. I vowed to make these cookies every Christmas from that moment on. They are so good, AND they are egg, dairy, and nut free!


Chocolate Crinkle Cookies--Egg, Dairy, and Nut Free
(recipe slightly adapted from the Food Allergy Mama)
Makes about 3 dozen cookies

1/2 cup vegetable oil
1 3/4 cup granulated sugar
1 cup unsweetened applesauce
1 cup cocoa powder
2 1/4 tsp vanilla
2 1/4 cup all-purpose flour
2 tsp baking powder
1/4 tsp salt
1 cup confectioners' sugar


In the bowl of an electric mixer, combine the oil, sugar, applesauce, cocoa and vanilla; mix well. In a separate, medium sized bowl, whisk together the flour, baking powder and salt. Add the flour mixture to the sugar mixture, and mix well.

Scrape the cookie dough out of the bowl, wrap in plastic wrap, and then place in the freezer for an hour (or refrigerate for at least 3 hours).

Preheat the oven to 350 degrees. Line baking sheets with parchment paper.

Lightly "flour" your hands with confectioners' sugar and  then scoop out about a tablespoon of dough. Roll dough into a perfect ball, and then roll the ball in the confectioners' sugar until completely covered. Place at least an inch apart on the prepared baking sheets. Bake for about 10 minutes or until just set. Do not over-bake. Cool on wire racks. Enjoy!

Monday, December 19, 2011

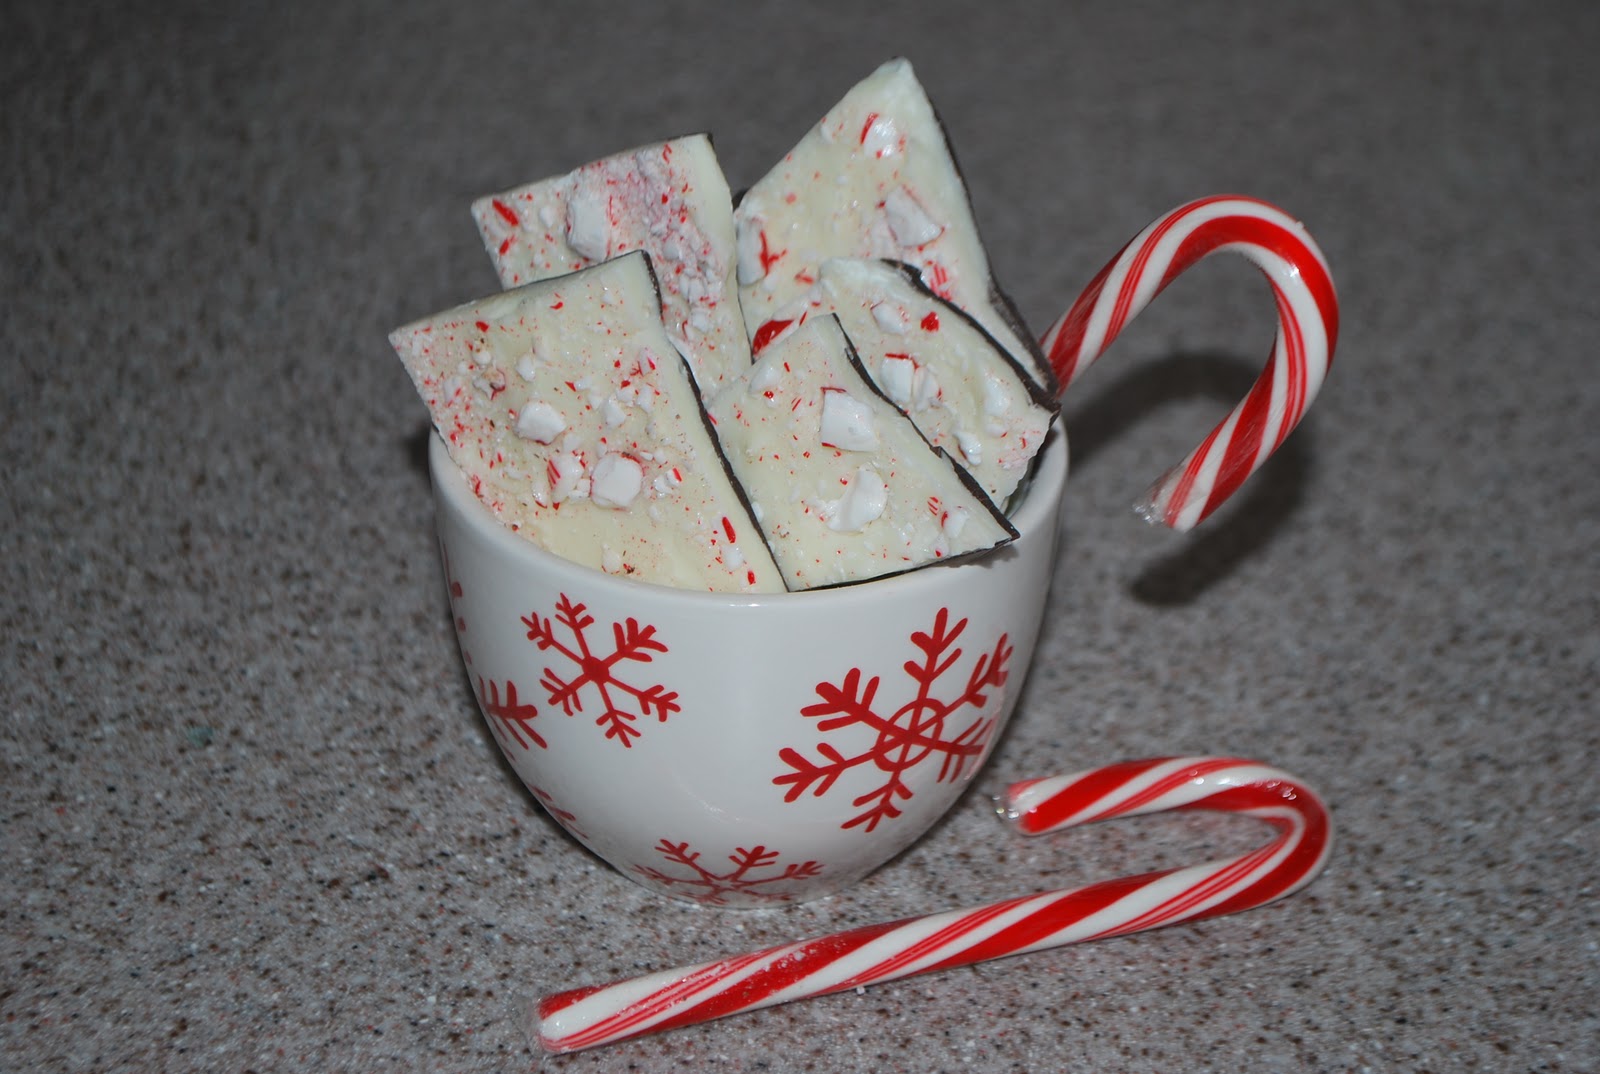
Peppermint Bark

I love peppermint bark. It's a Christmas staple in our house. I make LOTS of this candy every year. It's so easy to make, and to give!
Here's my favorite recipe:


Peppermint Bark

16 ounces white chocolate chips (or bars/block white chocolate)
12 ounces dark chocolate chips (or chocolate bars)
2 tsp peppermint extract, or 1 tsp peppermint oil, divided.
12 peppermint flavored candy canes, crushed


Line a baking sheet, or jelly roll pan with nonstick foil or wax paper (I prefer the wax paper).

Using a double boiler, heat the water to a simmer and melt the dark chocolate, or in a microwavable bowl, heat the dark chocolate at 50% power in the microwave, until melted, stirring every 30 seconds or so. Briskly stir in 1 tsp of peppermint extract, and then spread the dark chocolate onto the prepared pan, in an even, thin layer (I recommend not spreading it all the way to the edges of the pan).
Place pan in the fridge until almost set, about 5 minutes or so.

Meanwhile, Use a double boiler to melt the white chocolate following the previous step, or in a microwavable bowl, melt the white chocolate, in the microwave, at 50% power until melted, stirring every 30 seconds or so. Then, while stirring, add remaining 1 tsp peppermint extract (the chocolate may thicken or "chunk" a little--just keep stirring until smooth again).
Remove the dark chocolate from the fridge, and quickly spread out the white chocolate in an even layer over the top of the dark chocolate.
Sprinkle the crushed candy canes over the top of the white chocolate (pressing down very gently, if needed, so the candy will stick).

Return the pan to the fridge, and chill until completely set (about 10 to 15 minutes). When ready, remove the pan from the freezer and break candy apart into pieces. Best if stored in an air tight container in the refrigerator. Enjoy!

Thursday, December 15, 2011

Date-Nut Filled Cookies

I would like to introduce you to my most favorite Christmas cookies of all time....date-nut filled cookies. They may not sound all that awesome, but seriously, they are the best ever.
My grandmother would make these cookies every year for our family Christmas gathering, and my mom would also make them for us, for a Christmas treat. I love them SO much. Whenever I bake these cookies, I am reminded of the many wonderful Christmas memories I have.....of my mom.....my grandmother....my cousins and extended family....and all of the happy times of my childhood.
Here's my beloved recipe:


Date-Nut Filled Cookies
(Recipe adapted from an old Fanny Farmer Cookbook. Makes about 30 filled cookies.)

Old Fashioned Sugar Cookies:

1 cup unsalted butter
1 1/2 cups granulated sugar
2 eggs
2 T milk or cream
1 tsp vanilla
3 to 3 1/2 cups all-purpose flour
1/2 tsp salt
1/2 tsp baking powder

Date-nut filling:

1 cup chopped raisins
1 cup finely chopped dates
1/2 cup chopped walnuts
1 cup water
1 cup granulated sugar
1 tsp all-purpose flour


To make the cookies:

In the bowl of an electric mixer, cream together the butter and sugar. Add the eggs, one at a time, mixing well after each. Beat in the milk and vanilla; mix well.

In a separate bowl, sift together the flour, salt and baking powder. Add to the butter/sugar mixture slowly, mixing well. (add more flour, one tablespoon at a time, if needed, until dough isn't very sticky)

Divide the dough in half, and wrap in plastic wrap. Refrigerate for at least an hour (can be left overnight).

To make the filling:


In a small saucepan, combine the raisins, dates, walnuts, water, sugar, flour, and heat to just a boil over medium-high heat; stirring occasionally. Reduce heat to low and boil gently for about 20 minutes, until the mixture is thickened. Let cool to room temperature (mixture will thicken more upon standing).

To assemble cookies:

Preheat oven to 325 degrees. Line baking sheets with parchment paper so the cookies won't stick.

Remove one half of the dough from the refrigerator (keep other half chilled until ready to use). Roll out the dough on a lightly floured surface to a 1/4 inch thickness. Use a round 2 1/2 inch cookie cutter or biscuit cutter to cut out the cookies. Lay them in a single layer on the prepared baking sheet; about an inch apart.


Spoon about one teaspoon of the date-nut mixture on the center of each cookie. Then place a second cookie over on top of each, slightly pressing down along the edges. Using the tines of a fork, seal the edges of each filled cookie, and prick the centers. Repeat with remaining dough.


Bake for about 13-16 minutes or until light brown on the bottoms and the edges. Let cool, and then enjoy!

Wednesday, December 7, 2011

M&M Party Cookies

The holiday season is now in full swing, and it's time for me to start planning my Christmas goodie bags that I send to my extended family each year. I usually mail cookies, candy and other yummy treats. My mom used to do something similar to this for her family every year. Giving homemade gifts is such a wonderful way to show love to each other during the holidays.
These M&M cookies are one of my absolute favorites. I've been baking them since I was little girl, and I still make them every year for Christmas. Everyone loves them.
When my father-in-law was serving in Iraq a few years ago, I mailed a HUGE box of these cookies to him to share with his fellow soldiers for Christmas. They all loved them and were so thankful for the homemade treat. Here's the recipe:


M&M Party Cookies

1 cup vegetable shortening
1 cup light brown sugar
1/2 cup granulated sugar
2 tsp vanilla
2 eggs
2 1/4 cups all-purpose flour
1 tsp baking soda
1 tsp salt
1 1/2 cups milk chocolate M&M's (or mini M&M baking bits)


Preheat oven to 375 degrees.
In the bowl of an electric mixer, blend together the shortening, brown sugar and granulated sugar. Beat in the vanilla and eggs.
In a seperate medium sized mixing bowl, whisk together the flour, baking soda and salt. Add the flour mixture to the sugar mixture and mix well.
Add 3/4 cup M&M's (or 1 1/4 cups mini M&M baking bits) to the batter and mix well, using a spoon.

Drop by rounded tablespoons onto parchement lined baking sheets. Use remaining M&M's to add to the tops of the unbaked cookies (I usually put 3 on each).
Bake for 10 minutes until light golden brown. Cool on wire racks. Enjoy!

Monday, December 5, 2011

Individual Pumpkin Spiced Cheesecakes

I love, love, mini or individual sized desserts, and I also love cheesecake. Combine the two and well, I'm in heaven. There are so many different flavor cheesecake combinations out there, but I happen to love these little pumpkin spiced cakes. They are so good. If you prefer plain cheesecake, try this delicious recipe as well. Either recipe will be a wonderful addition to your holiday menu!


Individual Pumpkin Spiced Cheesecakes
(recipe adapted from the Can you stay for dinner? blog)

Makes 12

For the crust:

5 oz graham crackers (9 whole crackers sheets)
3 T granulated sugar
1 tsp cinnamon
1/2 tsp ginger
1/4 tsp nutmeg
1/4 tsp ground cloves
6 T unsalted butter, melted

For the filling:

2- 8oz packages cream cheese, softened
3/4 cup granulated sugar
3/4 cup pumpkin puree
2 T all-purpose flour
1 tsp cinnamon
1/2 tsp ginger
1/4 tsp nutmeg
1/4 tsp ground cloves
1/4 tsp allspice
1/4 tsp salt
1 tsp vanilla
2 eggs
1 egg yolk


Preheat oven to 325 degrees. Line a 12 cup muffin pan with double thickness paper liners.

To make the crust: grind the graham crackers finely, using a food processor. Then whisk in all of the spices until evenly combined. Stir in the melted butter and mix well. Scoop about a tablespoon of the crust mixture into each of the prepared muffin cups, pressing down firmly.

Bake for 8-10 minutes. Cool on a wire rack. Do not remove from pan.

To make the filling: In a bowl of an electric mixer, beat the cream cheese and sugar until smooth. Add the pumpkin, flour, spices, salt and vanilla; mix well. Add the eggs and egg yolk and mix on low speed until just combined.

Divide the batter into the prepared crust cups, filling them to just below the top of the paper liner (you may have left over batter).

Bake for 25-30 minutes, or until the center is just set.
Remove to a wire rack and let cool in the pan.

Refrigerate (in the pan) for at least 4 hours or over-night (over-night is best!). To serve, remove the well chilled cheesecakes from the paper liners and place on serving plates. Top with a dollop of homemade whipped cream. Enjoy!

Wednesday, November 30, 2011

Wacky Cake

Every year, for as long as I can remember, my mom would always make a wacky cake for my sister's birthday. It's my sister's favorite cake (and mine as well), so to carry on the tradition, I still make this cake for her every year. The cake itself is so incredibly moist, and has a delicate chocolate flavor. It's just so unbelievably good. My sister and I don't like this cake with frosting on it, but rather a big dollop of whipped cream. I have, in the past, made this cake into cupcakes (just adjusted the cooking time) and frosted them with my favorite chocolate frosting (recipe here), and they were very good, but I still prefer eating it with only the whipped cream.
Happy Birthday to my dear sister, Kate!


Wacky Cake
(recipe from my mom)

3 cups all-purpose flour
2 cups granulated sugar
1 tsp salt
1/2 cup cocoa powder
2 tsp baking soda
2 T white vinegar
2 tsp vanilla
2/3 cup vegetable oil
2 cups water


Preheat oven to 350 degrees. Spray a 13x9 baking dish with nonstick baking spray.
In a large bowl, whisk together the flour, sugar, salt, cocoa and baking soda. Add the water, oil, vanilla and vinegar. Mix well.
Pour cake batter into the prepared baking dish.
Bake for about 35 minutes, or until a toothpick inserted in the center, comes out clean.
Let cool. Best served slightly warm, with whipped cream, or can frost with favorite chocolate frosting, if desired. Enjoy!


Wednesday, November 23, 2011

Southern Chess Pie and Pecan Pie

My southern husband's two most favorite pies are: pecan and chess. I'll agree that pecan pie has always been one of my favorites as well, but being a "yankee", I had never heard of a chess pie until I met my husband. His Aunt Mary sent me her chess pie recipe shortly after Michael and I were married, and I was amazed the first time I made it. It was SO good. Now it's a staple dessert at our Thanksgiving meal every year, along with a pecan pie.
I hope everyone has a wonderful Thanksgiving!


Aunt Mary's Chess Pie

1- 9 inch unbaked pie crust (homemade or store bought)
1/2 cup (1 stick) salted butter, melted
1 cup granulated sugar
1 T cornmeal
2 eggs
4 T milk (whole or 2 %)
1 T white vinegar
1 T vanilla


Preheat oven to 350 degrees.
Line a pie plate with the unbaked pie crust.
Whisk together the butter, sugar, cornmeal, eggs, milk, vinegar and vanilla. Pour into the unbaked pie crust. Bake for 35-40 minutes until set. Cool completely and then serve with homemade whipped cream! Enjoy!


Southern Pecan Pie
(adapted from a recipe by Guy Fieri)


1- 9 inch unbaked pie crust (homemade or store bought)
1 cup light corn syrup
1 cup light brown sugar
1/2 tsp salt
5 T unsalted butter, melted
1 tsp vanilla
3 large eggs
2 cups toasted pecans, chopped*

Preheat oven to 375 degrees.
Line a pie plate with the unbaked pie crust, flute the edges.

In a large bowl, whisk together the corn syrup, brown sugar, salt, butter and vanilla.
In a small, separate bowl, lightly beat the eggs. Then whisk the eggs into the sugar mixture.
Fold the chopped, toasted pecans in to the egg mixture.

(* I highly recommend toasting the pecans for the best flavor, but it's optional. Here's how to toast the pecans: For every 1 cup of pecan halves: melt 1 T butter in a saucepan. Remove from the heat, add the pecans and toss to coat. Spread pecans onto a parchment lined baking sheet in a single layer. Bake in a preheated 350 degree oven for 5-7 minutes, until fragrant. Remove from oven and let cool. )

Pour pecan mixture into pie crust. Bake for about 40 minutes or until the center is set. Let cool completely (or overnight) before slicing. Serve with homemade whipped cream! Enjoy!


Tuesday, November 22, 2011

Moist Pumpkin Spice Muffins (With Cream Cheese Frosting)

With Thanksgiving coming up very soon, I thought I would throw out a few of my favorite Thanksgiving dessert recipes. My entire Thanksgiving menu changes from year to year, but usually includes: an herb roasted turkey, mashed potatoes, mashed butternut squash, green bean casserole, a sweet potato casserole, sausage-sage stuffing, homemade dinner rolls and bread, olives, pickles, and cranberry sauce. But because dessert is the best part, I always make a few different pies and/or treats for dessert to make everyone happy. I traditionally make this apple pie, a pumpkin pie or pumpkin cheesecake, pecan pie, and a chess pie (recipes to come!). I also like to make cupcakes or fun thanksgiving themed cookies for the kids (and adults).
This muffin recipe is sooooo good and when combined with the frosting, it transforms into an amazingly good cupcake. My kids love these and so do I. I like to make them as mini versions, but they are just as good regular sized. Hope you enjoy these! Stay tuned for more recipes!


Moist Pumpkin Spice Muffins (With Cream Cheese Frosting)
(recipe adapted from the pioneer woman--makes 12 regular sized or 24 mini muffins)

For the muffins:

1 cup flour
1/2 cup sugar
2 tsp baking powder
1 1/2 tsp cinnamon
1/4 tsp ground ginger
1/2 tsp nutmeg
1/2 tsp salt
4 T unsalted butter, cut into pieces
1 cup pumpkin puree (heaping)
1/2 cup evaporated milk
1 egg
1 1/2 tsp vanilla

For the frosting:

1/4 cup unsalted butter, softened
4 ounces cream cheese, softened
1/2 pound confectioners' sugar (about 2 cups)
1/2 tsp vanilla


To make the muffins:
Preheat oven to 400 degrees.
Spray a 12-cup muffin or 24 cup mini muffin tin with baking spray.

In a large bowl, sift together the flour, sugar, baking powder, cinnamon, ginger, nutmeg and salt. Cut in the butter using a pastry cutter or two forks, until it is fully incorporated.

In a seperate bowl, mix together the pumpkin, evaporated milk, egg and vanilla. Pour pumpkin mixture into the flour mixture and gently fold until just combined.

Evenly pour the muffin batter into the greased muffin cups--about 1/2 full in each.
Bake for about 20-25 minutes if using a 12-cup pan or about 15-20 minutes if using a mini muffin pan.
Remove from the pan and let cool completely before frosting.

To make the frosting: combine all of the frosting ingredients and mix on high speed until fluffy and soft. Frost the cupcakes per desired technique and then store in the refrigerator until ready to serve. Enjoy!

Monday, November 21, 2011

Awesome Caramel Corn

My family and I LOVE caramel corn. I've made a few different recipes over the years, but we think this particular recipe is the BEST. I make this a lot during the holidays and send it to most of our extended family as part of their gifts. I like to make the caramel corn even more awesome by adding a few special touches, like drizzling colored chocolate over it, adding candy or chocolate bars, or candied nuts. You must try this recipe!

caramel corn mixed with chopped Twix bars and drizzled with melted chocolate
 Carol's Caramel Corn
(recipe adapted from King Arthur Flour)

15 cups popped corn
2 T molasses
1 cup brown sugar, packed (I use light)
1/2 cup salted butter
1/4 cup light corn syrup
1/2 tsp baking soda


Preheat oven to 200 degrees.
Line a large baking sheet with parchment paper or nonstick foil.
Pour the popped corn into a large bowl (at least 6 quart).

In a large saucepan, over medium-high heat, bring the molasses, brown sugar, butter and corn syrup to a boil. Boil, stirring frequently, for 5 full minutes.

Remove the pan from the heat and add the baking soda. Stir well as the mixture turns foamy.

Immediately (and carefully!) pour the very hot caramel syrup over the popped corn and stir until the corn is well coated.

Spread the hot caramel corn onto the parchment lined pan. Bake in the preheated 200 degree oven for one hour. Stir the corn every 15 minutes during this time.

Remove caramel corn from the oven and let cool. Break apart and put into air tight containers. If desired, mix in choice of candy, nuts or drizzle with melted chocolate before storing. Enjoy!