Pages

Friday, February 25, 2011

Chicken Risotto

Rich, creamy and oh, so good. That's the only way to describe this risotto. Plus, my variation has chicken in it and a vegetable (which is optional) so it's a complete dinner. Perfect!

Although I'm all French, I swear I should have been born Italian because I love Italian food. Don't get me wrong, I love French food too--rich, hearty meals, decadent desserts and of course, bread and cheese, but my heart belongs to Italian food. I would love to visit Italy some day and enjoy their culture and food. It would be the best 20 pounds I would ever gain!
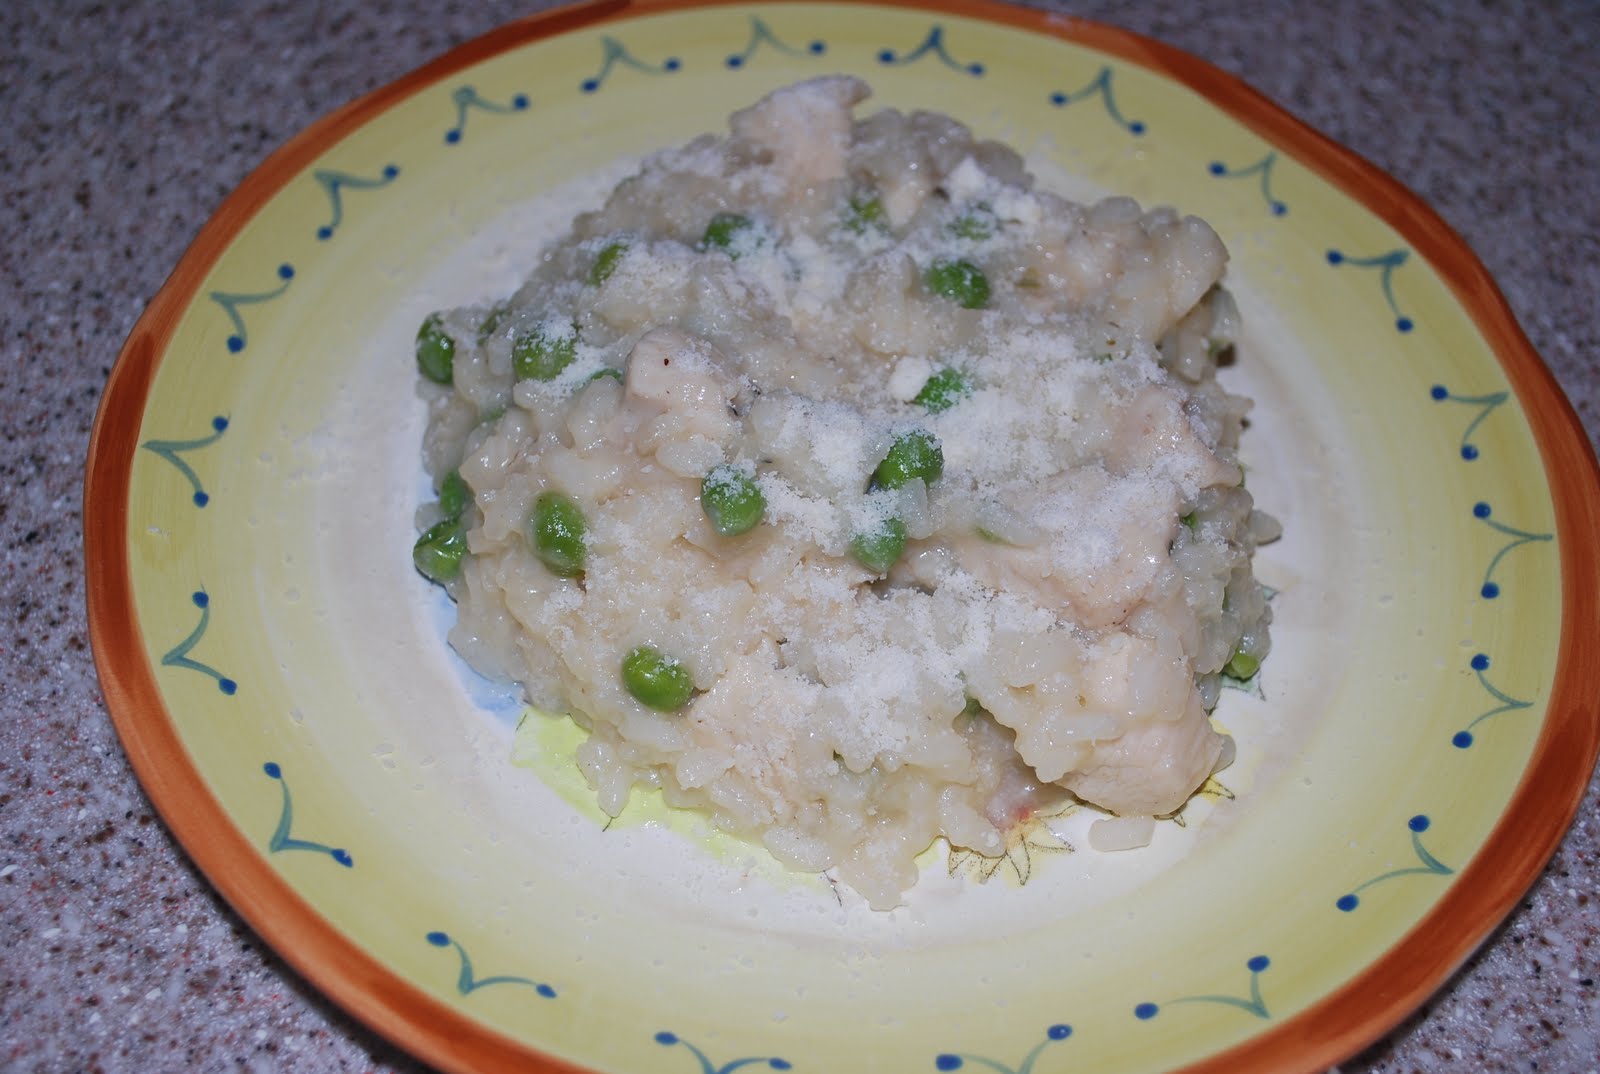

Chicken Risotto

2 T margarine/butter or extra virgin olive oil
1 lbs boneless chicken breasts, cut up into bite sized pieces
1/2 tsp kosher salt
1/4 tsp fresh cracked black pepper
1 small onion, diced (about 1/2 cup)
1/2 cup dry white wine
2 cups Aborio rice
1 T dried parsley (can use fresh, but use 2 T finely chopped)
5-6 cups low sodium chicken broth
1/2 cup reduced-fat parmesan cheese
1 cup cooked green vegetable--optional (i.e. petite peas, baby broccoli florets, cut up asparagus, etc.)


Heat chicken broth in a large sauce pan over low heat. Do not boil.

Cook vegetable (if using) according to your preference, then drain and set aside.

Meanwhile, in a dutch oven, heat butter or oil over medium heat. Add chicken, season with salt and pepper, and cook until completely cooked through. Remove chicken to a bowl, reserving juices and left over oil in pot; set aside.

Add the onion to the pot and cook until soft, over medium-low heat, about 4 minutes. Add the wine to the pot and heat to a simmer. Add the rice and parsley and let simmer for a couple of minutes until most of the liquid is absorbed, stirring frequently.


Then add about 1 to 1 1/2 cups of hot broth to rice and let simmer, uncovered, until most of the liquid is absorbed, stirring occasionally.
*Note: Most people are afraid to make risotto because they feel like they have to "watch it" constantly and stir it all the time and granted, most of that is true, but it's really not that stressful. Just keep an eye on the rice while it's simmering and DO NOT let it absorb ALL the liquid. Just remember to add more broth before it gets to that point. And honestly, you're only standing near the stove for like 20 minutes. Breathe, relax and think of how good the risotto is going to be when it's done and how good you'll feel having done all that "hard" work. :)

Continue to add broth to the rice and let simmer, stirring occasionally. You'll use most of the hot broth in the sauce pan. Once rice looks plump and is tender, after about 20 minutes or so (It's OK to try a little bite of it....don't be scared to!), add about 1/2 cup more of broth and then add the parmesan cheese, chicken and vegetable (if using) to the pot. Check seasoning--it's important--and add more salt if desired. Heat for about 5 minutes and then turn off heat and let rice sit for a minute before serving. Enjoy!


Wednesday, February 23, 2011

Maple Apple Walnut Bread

I came across this recipe the other day and I instantly wanted to make it. Just the name alone intrigued me. The results? WOW. This bread is gooood. I love how moist it is and all of the different textures in it. It's pretty healthy too. I gave it to my kids for breakfast and they were very impressed. This recipe is definitely a keeper and I will be making it often!


Maple Apple Walnut Bread
(slightly adapted from a recipe by Brandi from Tasty Kitchen)

1/3 cup margarine (or unsalted butter), melted
2 cups white whole wheat flour (or regular whole wheat)
1/2 cup quick cooking oats
1 1/2 tsp baking powder
1/4 tsp salt
1/4 tsp baking soda
1 tsp cinnamon
1/4 tsp ground cloves
1/4 tsp ground nutmeg
1/4 tsp ground ginger
1/2 cup sugar
1/2 cup REAL maple syrup
2 eggs, beaten
1 tsp vanilla
1 cup milk (I used 1%)
1 whole apple, peeled and diced (equals about 1 full cup--I've made it using a cortland and then with a gala and both came out great)
1 cup walnuts, chopped

Preheat oven to 350 degrees. In a large bowl, mix together the flour, oats, baking powder, salt, baking soda, cinnamon, cloves, nutmeg and ginger. In a smaller, seperate bowl, mix the sugar, maple syrup, eggs, vanilla, milk and melted margarine.

Add sugar mixture to the flour mixture and mix well. Fold in the apples and walnuts.

Pour batter into a 9x5 bread loaf pan, greased with baking spray. Bake for 70-75 minutes or until the top is golden brown and when a toothpick is inserted in the middle, comes out clean. Enjoy!


Monday, February 21, 2011

Italian Pasta and Bean Soup

I'm a huge soup fan. I love to make (and eat) all kinds of soup. I'm especially fond of vegetable and pasta soups. This recipe came to me from my friend Mary Nadeau. She is a wonderful cook and I'm so glad she shared this soup with me because it is awesome. I love the flavor and I love that it's fairly light, yet filling, and super quick and easy. I hope you will love it too!


Italian Pasta and Bean Soup
(slightly adapted by me)

1 T extra virgin olive oil

1 small onion, diced

2 cloves fresh garlic

4 cups low-sodium chicken broth

1 full cup mini bowtie pasta

1 can cannelloni beans, drained and rinsed

1 can petite diced tomatoes (with juice)

1/2 tsp kosher salt

2 T dried parsley

2-3 T grated parmesan cheese

Heat oil in a large pot. Add the onion and cook until soft, but not browned, about 4 minutes. Add the garlic and cook for one minute.
Add the chicken broth, salt and parsley and heat to a simmer. Cook for 5 minutes (I covered the pot during simmering).
Add the pasta to the pot, bring back to a simmer, cover and cook for another 5 minutes.
Add the tomatoes and beans. Simmer for another 2-3 minutes. Remove from heat and stir in the parmesan cheese.
Check seasonings, cover and let sit for a few minutes before serving. Enjoy with some homemade herbed focaccia bread or Italian bread! Serves 3.


Wednesday, February 16, 2011

Asparagus Lasagna

I got a wonderful Valentine's Day gift from a friend yesterday. My friend typed out some of her favorite recipes for me and they all sound delicious, so while I'm trying these new recipes (which I am so excited about), I want to share one of my favorite recipes with you.

Asparagus lasagna. Sounds weird, but it's really good. It has asparagus, ham, cheese, noodles, in a garlic/thyme white sauce. If you are not an asparagus fan, then this recipe is not for you, but if you love asparagus like I do, then you are in for a real treat. Let's start this adventure!


Asparagus Lasagna
(generously adapted from a recipe in the 1998 Taste of Home Annual Recipes cookbook)

1 1/2 lbs fresh asparagus, trimmed and cut into 2 inch long pieces
1 small onion, diced
4 fresh garlic cloves, minced
1 tsp dried thyme
1/2 tsp kosher salt
1/4 tsp black pepper
4 T "light" margarine (you can use unsalted butter or regular margarine, if you want)
4 T flour
2 2/3 cups milk (I used 1 %)
1 pkg lasagna noodles, cooked for HALF amount of directed time on package
2 cups 2% reduced fat shredded mozzarella cheese
2 cups julienned fully cooked ham (or just cut into small pieces)

*NOTE: I cook for 6 people every night so if you have less mouths to feed, this recipe can easily be cut in half. You will want to use a smaller pan though. An 11 x 7 x 2 would work well.


In a 2 qt saucepan, bring asparagus and a couple of inches water to a boil and cook until crisp-tender, about 4 minutes, stirring occasionally. Drain and set aside. Meanwhile, in a 3 qt saucepan over medium heat, saute onion in melted margarine for 4 minutes. Add garlic, thyme, salt and pepper. Cook for another minute or so. Whisk in flour, stir and let cook 1 minute. Gradually whisk in milk. Cook for 5 minutes or until sauce is slightly thickened; remove from heat.


Spray a 9 x 13 baking pan with cooking spray. Layer 3 noodles on bottom of pan. Ladle 1/3 of white sauce onto noodles, then 1/3 mozzarella cheese, 1/3 of the ham and then 1/3 of the asparagus. Repeat layers until all ingredients are used up, sprinkling the top with a little bit of mozzarella cheese or Parmesan cheese, if desired. (this could easily be made into 4 layers by simply dividing ingredients into fourths instead of thirds--we like it thicker so that is how I usually make it)


Cover pan with foil and bake at 350 degrees for 30-40 minutes until hot and bubbling. Cut into desired portions and enjoy! :)

*NOTE: I used oven ready lasagna noodles in the pictures. I don't usually cook with them, but I had some in my pantry that needed to get used. I prefer to use regular lasagna noodles.


Monday, February 14, 2011

Beef Carbonnade

Happy Valentine's Day!

Ok, friends, this is a great beef recipe. At my house, we seem to eat a lot more beef in the winter then we do in the summer, probably because there is so many different ways to prepare all different cuts of beef and the best ones involve slow cooking with fat. No one wants to cook inside during the summer or with added fat so that's why winter cooking is so great :)

I found this recipe not too long ago and the first time I made it, my whole family LOVED it. At first, the name of the recipe made very skeptical because "Carbonnade" literally means beef stew made with beer and onions. That stopped me right there because 1) I hate cooking with beer and 2) it meant LOTS of onions. BUT, the author of the blog I found the recipe at, really made this recipe sound good and worth my time to try.

I would like to emphasize that you should NOT be scared about the large amount of onion in this dish. The onions cook for a long time and basically disappear, leaving only their flavor behind.....and it's a gooooood flavor. Trust me!

Ok, if you dare, let's make this!


Beef Carbonnade
(adapted from Amanda's Cookin')

2 slices of thick bacon, finely diced (use 3 slices of regular bacon)
2 lbs boneless chuck stew meat, cut into 1 inch pieces, if needed
1/2 tsp kosher salt
1/2 tsp black pepper
2-3 fresh garlic cloves, minced
5 cups diced onion (Yes, 5 cups)
3 T all-purpose flour
1 cup low sodium beef broth
2 tsp white wine vinegar
1/2 tsp sugar
1/2 tsp dried thyme
1 bay leaf
1 (12 oz) can of light beer
1 pkg whole wheat egg noodles, cooked. Add a little salt and butter to taste, if desired.

Preheat oven to 325 degrees. Cook bacon in large Dutch oven over medium heat until crisp. Remove bacon with a slotted spoon to a small bowl, reserving drippings in pan. Set bacon aside.
Cook beef, seasoned with salt and pepper, in drippings over medium heat for 3-5 minutes until beef is brown on all sides. Add garlic and cook for an additional 3o seconds. Remove beef with a slotted spoon to a bowl (the beef will not be cooked through); set aside.

Add onion to pot; cover and cook for 10 minutes, stirring occasionally.


Stir in flour and cook for 2 minutes. Add beef broth and next 5 ingredients to pot and bring to a boil. Return bacon and beef to pot.


Return to a boil, cover and bake in oven at 325 degrees for 2 hours or until beef is tender. Discard bay leaf. Serve over hot cooked and buttered noodles. Serves 6.

I also like to serve this with a fresh green salad and homemade bread. In the pictures, I served it with Italian bread; recipe coming soon, hopefully :)


Wednesday, February 9, 2011

Homemade Valentine's Day Part 2


My kids really wanted to make a special heart-shaped candy box to put the truffles in that they helped me make for their dad. They love him so much and all wanted to make him something extra special this year instead of the homemade cards that they usually make him for Valentine's Day.

There are so many different ways to make a candy box. I was searching for a relatively easy design to use as a template, and during my search, I came across some of the most beautiful homemade boxes. The creations amazed me and made me wish I was half as crafty as those people are!
I decided that because my children were the ones that were actually going to be making the candy box, I would have them use more kid-friendly materials.

They started by cutting out some heart shaped templates out of paper. They needed one big heart for the bottom and top of the box and two smaller hearts for the inside of the box, one being slightly smaller then the other so when we attached the edges, the top and bottom would fit together.

Once that was done, they traced and cut out the hearts on red card stock, along with strips for the sides. I decided that because card stock is flimsy, to make the top and bottom of the box with two pieces of card stock each. That worked out a lot better.

Then the gluing began. First the hearts for the top and bottom were glued together, then the smaller hearts glued to the inside of the larger hearts. Then I carefully glued the side strips around the outer edges of the smaller hearts with a hot glue gun. That worked wonderfully!


Finally, my kids decorated the candy box. Billy did a wonderful job using the glue to make letters and everyone had fun sprinkling glitter. My kitchen was a disaster when they were finished! The mess was made with love though :)

My kids love their finished product and think daddy will love it too :) Hope everyone has a wonderful Valentine's Day!


Saturday, February 5, 2011

Homemade Valentine's Day Part 1


CHOCOLATE. Isn't that what Valentine's Day is all about? Well, it is to me! How about giving the one you love HOMEMADE chocolates this year....? What, too hard? No time to make them? Not anymore! Homemade, wonderful chocolate truffles are easy, I promise! All you need is a little time, some passion for chocolate, and some love for your Valentine...

To start the chocolate truffles, you will need to purchase some GOOD chocolate. I'm not talking about buying a few cheap Milk Chocolate Hershey bars and melting them.......I mean truffle worthy chocolate. Now, I am blessed to live literally within a few miles of the famous King Arthur Flour store and bakery (believe me, I take full advantage of that!), and they sell GOOD chocolate. I am particularly fond of their Burgundy Chunks because I love their deep chocolate flavor, but you can use whatever GOOD chocolate you can find near you.

The first step is to heat 1 cup of heavy cream. I choose to do this in the microwave because it's faster. Heat the cream to boiling, but watch it because it will easily boil over. Then immediately pour cream over 2 cups of chopped chocolate in a separate bowl. Whisk quickly so the hot cream will melt the chocolate.
Once chocolate and cream are thoroughly mixed and resemble dark, pure chocolate bliss (called ganache), pour into a 9x9 round cake pan or equivalent sized or larger baking dish. Place immediately in the refrigerator and let chill for at least a couple of hours.


You'll know the ganache is ready because it will be "scoopable". A good way to test is to scoop a small amount into your hand and then see how fast it melts. If it melts almost instantly, then the ganache is NOT ready, but if it holds it's shape, even after being rolled around in your palm over a few seconds, then it's ready. If you find your ganache is still too soft, place it back in the fridge and let chill for another half hour or so. Sometimes, I will put mine in the freezer for 15 minutes before I use it to make sure it is ready.


Once the ganache is ready, it's time to begin! I like to make all the truffle balls first. I scoop out about a teaspoon or so of ganache and QUICKLY roll it around in my hands to form a ball. Don't worry if it's not perfectly round! Then I gently place it on a parchment lined baking sheet. I repeat this until all the ganache is used. Then I place the ganache balls back into the refrigerator for about a half hour to chill and firm up again. (The ganache balls in the picture below are a little larger then I normally make. I made the bigger ones special for Valentine's Day)


When you are done, your hands should look something like this.....yummmm :)


After chilling, it's time to coat these little balls of pure heaven with melted chocolate. You can use good chocolate for this step as well, but I really like using Wilton's Dark Cocoa Candy Melts. They are not fancy, or the best chocolate, but give consistently great results. I prefer to spend my money on the truffle filling chocolate instead, that's the best part!

Now, the way I learned to cover the truffles in melted chocolate is a little different, but is a way used by many people. I first put on some latex free gloves. Then I melt the chocolate (I prefer the microwave). Then I dip my gloved hands (about half way) into the melted chocolate, covering my fingers with chocolate. Then I quickly and carefully pick up a ganache ball and roll it between my hands, covering the ball with melted chocolate. Then I place the truffle onto a different parchment lined baking sheet to set. Continue to do this until all the truffles have been covered in chocolate. Place the pan back in the refrigerator for another 10 minutes or so to make sure chocolate coating is set.


(There are lots of other coatings you can use instead of the chocolate if you wish. Some include: cocoa powder, sprinkles, finely chopped nuts, and coconut. If using these toppings instead, just roll in desired topping directly after making the ganache balls)

To decorate the hardened chocolate coating, I like to use more melted candy melts to adhere my toppings or just create a pretty design. You don't have to do this, but the results are so pretty and give your truffles a unique and personalized look. Store the truffles in the refrigerator until ready to gift, for up to one month, as long as they are kept cold. YUM!


Next: A special homemade Valentine gift for a special person!


Valentine's Day Cookies


I love to bake. Some of my most special memories of my mom are the times when she and I baked together. I'm so happy that I can now pass on my mom's and my passion for baking to my children and others.

For a fun Valentine's Day project, my three favorite little bakers Ethan, Jack and Matthew, helped me make some yummy chocolate sugar cookies.


They cut out heart shaped cookies, but being boys, they insisted that dinosaurs were also perfect for Valentine's Day. I agreed :) I just love these guys!


The cookie recipe we used was from The Food Allergy Mama. They were really good! I asked the boys what kind of plate I should put the cookies on to take a picture and they all thought a heart plate would be the most appropriate. So here's what they came up with:

Kind of cute, huh? More Valentine's Day fun to come soon!

Friday, February 4, 2011

Turkey and Saffron Red Rice

I made this recipe for the first time the other night. It was super quick and easy to make. My husband and I LOVED it. The flavor was awesome. My kids weren't as excited about as we were, but that's ok. The next time I make it, I'm going to make just for my husband and I (the kids can have grilled cheese, haha) and I'm going to add more cumin and maybe a little spice and it will be fabulous! If you feel like something different for dinner tonight, then I highly recommend making this!

(*NOTE: Saffron is pretty expensive, but really makes this dish shine. I buy one jar of it a year with a coupon. If you don't have saffron, then you can just leave it out or possibly replace it with a very small amount of turmeric, starting with a 1/4 tsp and adding more if you want. )


Turkey and Saffron Red Rice
(recipe adapted from Picky Palate)

2 cups Basmati rice, uncooked
3 T extra virgin olive oil
1 1/2 cups onion, chopped fine
2 T fresh garlic, minced
1 to 1 1/4 lbs ground turkey
1/2 tsp kosher salt
1/4 tsp fresh cracked black pepper
1 pkg frozen cut green beans, cooked or 2 cans cut green beans, drained
8 oz to 15 oz of tomato sauce (I used closer to a whole 15oz can)
1 T ground cumin
1/2 tsp paprika or smoked paprika
1/4 tsp garlic salt
1 T saffron threads

Cook rice according to package directions. Heat oil in a large 5 quart dutch oven or pot over med heat. Add ground turkey, salt and pepper and cook for 2 minutes. Then add the onion to the meat and continue cooking until meat is done and onions are soft and translucent.


Stir in the garlic and cook for another minute. Stir in green beans, rice, tomato sauce, cumin, paprika, garlic salt and saffron.


Stir until well combined and heated through over low heat, about 4-5 minutes. Check seasonings before serving. Enjoy!


Wednesday, February 2, 2011

Bowtie Lasagna

Here's a simple, great tasting, and quick dish. This recipe comes from a member at Tasty Kitchen. I've made this a few times and my whole family loves it. This is perfect for a quick weeknight dinner!


Bowtie Lasagna
(generously adapted by me)

1 to 1 1/2 lbs lean ground beef
3/4 pkg bowtie noodles, cooked al-dente
1 small onion, diced
1 (14.5 oz) can petite diced tomatoes, drained
3 cups (or more) favorite pasta sauce or marinara sauce
1 T olive oil (optional)
1 tsp salt (or less, to taste)
1/2 tsp garlic powder
1 tsp italian seasonings
1/2 cup shredded mozzarella cheese or a mixture of italian cheeses
1/2 cup sour cream (I use fat free)
1/4 cup grated parmesan cheese (I use reduced fat)

Cook ground beef and onion in a large skillet. Drain. Add diced tomatoes and cooked noodles to beef. Drizzle with oil if desired. Pour sauce over noodles and meat. Add sour cream, seasonings, mozzarella and parmesan cheeses. Mix well and heat for 5-10 minutes until hot. Serve with extra grated parmesan cheese and crusty garlic bread. Enjoy!


Tuesday, February 1, 2011

Banana-Chocolate Chip Muffins

My youngest son, Matthew, loves bananas. He is my only child that does. I buy bananas for him each week, but I always seem to have some that either get too ripe too quickly or just don't get eaten. So, I am always looking for new recipes to use them in. I've made my share of banana bread in the past and am very sick of it so I was very happy when I bought "The Food Allergy Mama's Baking Book" by Kelly Rudnicki because in it is a great recipe for Banana-Chocolate Chip Muffins. My kids love these! They are always excited when I make them. I pack them in their lunch boxes for snack at school or serve them as an after school snack. Plus, this recipe is egg and nut free! Try them!


Banana-Chocolate Chip Muffins
(slightly adapted by me)

2 medium bananas, mashed
2 T water
1/2 cup margarine, melted
1/4 buttermilk (if you don't have any, mix 1/4 milk with 1 tsp white vinegar and let sit for 5 minutes or so)
1 cup all-purpose flour
1 cup white whole wheat flour
2/3 cup sugar
1 1/2 tsp baking powder
1 tsp baking soda
1/4 tsp salt
1/2 mini chocolate chips

Preheat oven to 375 degrees. Spray a 12-cup muffin pan with baking spray or line with baking cups. In a large bowl, combine mashed bananas, water, melted margarine and buttermilk until well incorporated (I usually do this by hand, but you can use an electric mixer if you wish).

In a medium bowl, combine all flour, sugar, baking powder, baking soda and salt using a whisk.

Add dry ingredients to the banana mixture and mix well. Stir in the mini chocolate chips.

Divide the batter evenly among the muffin cups. Bake for 15-20 minutes, or until golden brown and a toothpick or cake tester inserted comes out clean. Enjoy!